Solid Edge with ST2

26 June 2009

Process type: Design

This summer Siemens PLM Software is set to launch the second Solid Edge release based on its new Synchronous Technology. Al Dean got a sneak preview of the product that has helped drive the direct modelling revolution of the last 12 months

Product Solid Edge with Synchronous Technology 2
Company name Siemens PLM Software
Price from £3,995

With the release of Solid Edge and Synchronous Technology (ST) around this time last year, Siemens set in motion a chain of events that hasn’t been seen since the launch of parametric history-based modelling which was 20 years ago. We now have a situation where the dynamic editing of geometry, without having to worry about time-consuming history recalculation, is gaining ground in all areas of industry.

Siemens PLM has added Synchronous Technology to the helix, a complex geometric form that doesn’t lend itself well to direct manipulation. This image shows a helix shape for the blades as the first feature created with nearly instant changes

The introduction of ST by Siemens PLM brought a greater level of awareness to the market about the potential of such technology. While PTC already had CoCreate acquired, the original direct modelling application, and new kid on the block SpaceClaim had delivered its take on the technology, ST was certainly a catalyst for all that followed.

Dassault introduced dynamic editing with the launch of Catia V6, as did SolidWorks, although to a lesser extent with its 2009 release. PTC’s Pro/Engineer Wildfire 5.0 has learnt some direct modelling from CoCreate and Autodesk will shortly place Inventor Fusion on its Labs site for users to download. In short, it’s been quite a year.

We’re now about to see the launch of Solid Edge with Synchronous Technology 2.0 (ST 2) which is due to ship later this year (expected late summer).

Pushing Sync Tech further

Solid Edge with ST 2 sees the core principles established in the last release extended into new areas of the application. To recap, when stripped back, Synchronous Technology is about modelling geometry, often dynamically and often without features, but without the constraints associated with history.

Because there’s no history, calculation times are instant for most edits. The interesting thing is that it’s possible to still retain much of the power of parametric modelling, using specific dimensions and relationships to both add design intent and to drive design change (something which has been misinterpreted by many).

Look at the initial release, it’s pretty clear that it was just that - a formative release. The Sync Tech implementation was done with a basic set of commands and operations; those most suited to the technology (typically prismatic features - Extrude, Revolve, Hole, Round, Draft, Pattern and Thin Wall). Siemens couldn’t apply Sync Tech to everything that was in previous versions of Solid Edge, but that was never its intention. Instead version one was laying the foundations to offer a lot more power than the original short feature list might give away.

Despite the revolutionary nature of the new technology, users weren’t forced to use Sync Tech. They still had all of the power of the parametric, history-based modelling tools that had been in Solid Edge for over a decade. Sync Tech was never intended as a replacement or an end to traditional modelling techniques, but rather to create a fork in the road. The traditional tools would continue down one fork, while the Sync Tech-based tools forged a new path. What’s interesting is that now, with Version 2, there are links between these two paths emerging and it’s all becoming clear.

Modelling harmony

One of the key updates for this release has been the work done to change some of the fundamental problems that arise from direct editing. Feature-based modelling gives users the ability to store the explicit parameters, geometry and inputs to the creation of a specific feature. And while Solid Edge ST 1 had some basic features that were retained in the part file (such as holes and patterns), these were referred to as Procedural Features. These have been extended in this release to do one of two things: either to retain control over a geometry creation process or to allow it in the first place.

A good example of the former is how the system worked with draft. One of the big problems with any “direct modelling system” is that it is very easy to push and pull linear forms, with no draft. But when it comes to adding draft, particularly to complex geometry, then user could run into problems.

In Solid Edge ST 1, users could add draft with ease, but it was a one hit wonder and only worked with very basic geometry (the same is true of SpaceClaim by the way). As soon as the user rotates the faces to which the draft is applied, the ease of manipulation is lost. After all, if that process isn’t stored as a feature, it can’t be directly edited, and to reapply different draft would be rotating separate and individual faces. For draft operations in Solid Edge ST 2 the inputs and references are stored as a Procedural Feature and can be edited directly.

Another example of where traditional modelling techniques can influence geometry creation with Synchronous Technology is the ability to edit directly how fillets are formed at corners or intersections. You select the face, hit the button and you can switch between the two options - making life much easier, particularly if you, like me, always miss that one edge loop and have to go back selecting things again.

A perfect example of using features is found when looking at new ST-enabled capabilities. For this release in general terms, the addition of the helix is the big one. A helix is a complex geometric form and doesn’t lend itself well to direct manipulation. Solid Edge ST 2 stores the underlying sketches as part of a feature set, so you can edit them when you need to.

The new Live Section command allows the user to display a section through a part and then dive in to drag-and-drop the section geometry. The system instantly updates the 3D geometry that it is derived from. If Live Rules (on-the-fly constraints or relationship handling) or more formal constraints are set-up, the surrounding geometry will automatically update. If there’s a sticking point, it’s that it’s not possible to place a Live Section through a complete assembly, so working with multiple parts is a bit of a workaround - it’s possible to section one part and the rest of the geometry turns transparent.

Sheet metal goes ST

While the tools and updates I’ve already mentioned pertain to the core of Solid Edge’s toolset, this release also sees Synchronous Technology applied further and into the realms of task- or process-specific operations - namely, Sheet Metal design, which is perfectly suited to Sync Tech. Sheet metal forms are typically linear or planar in nature, and when the forms do get complex (typically at bends, folds and stamped features) intelligence can be used to handle K-factor and bend radii and geometry.

With the new release it’s possible to get working straight away, sketching out starting features, adding flanges, lips, cut outs and all that good stuff - directly and dynamically. This, as you would expect, is done using Live Rules and Live Section, and the implementation is excellent, particularly for a first bash.

The Live Rules and Live Section tools make it possible to work with geometry very intelligently, dynamically manipulating data into shape as required. There is a huge potential for editing imported sheet metal parts and the system will recognise the bends, folds and other features on the fly, allowing them to be edited. It also allows material to be switched. Solid Edge bases everything on the material properties being used in the model. An imported part designed in one material can have its material switched and the system will update the design, the bends and folds, and adapt to the characteristics of that material.

That’s hugely beneficial for those working in a subcontract environment. It might sound a small thing, but it could mean the difference between a part fitting or not.

Simulation

Alongside the updates made to Synchronous Technology, the good news is that Siemens has also been working on other tools, irrespective of which modelling methodology is used. This release sees the introduction of the Solid Edge Simulation. This is intended to bridge the gap between the Femap Express tool provided with the Velocity Series and the jewels in Siemens’ simulation crown, Femap (a pre/post processor) and NX Nastran (the industry standard solver code).

Solid Edge Simulation offers an environment that’s been integrated into Solid Edge to provide static stress, modal and buckling analysis of both individual parts and assemblies.

Built into the Solid Edge’s Ribbon UI, it provides a range of tools to initially set-up your simulation, then to solve and ultimately inspect the results and report upon them. As it’s based on Femap, there are a massive range of tools available to create a high-quality mesh, with a number of tools to adapt and refine it further. The workflow is clearly laid as boundary conditions are defined, loading and contact points identified.

All this set-up work is stored in the Pathfinder and everything remains clearly organised and fully editable. What’s interesting is how Femap’s capabilities to adapt meshing have been included, giving users the tools they’ll need to ensure the mesh is as closely suited to the simulation task as possible.
Once the set-up is done, the simulation is solved using NX Nastran, and the results can be inspected with the included tools. Then, just as importantly, comes the ability to generate a report.

Data Management

The last major update for Solid Edge with Synchronous Technology 2.0 is some work done to add up-to-date support for SharePoint 2008 within Solid Edge Insight. While PTC has been making a lot of noise of late about the launch of its SharePoint-based ProductPoint system, Siemens PLM got there sometime ago, albeit without the additional tools that PTC has added to its offering.

In addition to the existing tools used to control data, workflows, tasks and notifications, this release sees greater integration with Open and Save dialogues. These are now ‘PDM-aware’ and can automatically check data in and out of the SharePoint server. On a related note, the Assembly Pathfinder / product structure tree panel displays the status of assembly components and there’s greater performance for assembly opening, particularly when they feature inter-part links. Also on the assembly-related front, assembly tasks such as replace part, save as, revise are now supported within the system and the new document level security capability is now implemented for Solid Edge data.

Conclusion

The launch of Synchronous Technology brought the concepts of direct/dynamic modelling technology to the fore and added a whole lot of intelligence. As the first system to benefit from it, Solid Edge received a huge amount of exposure - something it had needed for some time. At the same time, many pundits got carried away with the Sync Tech shift and simply forgot the fact that Solid Edge has 15 years worth of development behind its history-based modelling tools - and that these are still very much available for users.

There is also the question of hype. Yes, Sync Tech was, and remains, a new way of working, but the first release left more than a little to be desired in terms of supporting common workflows and capabilities. That was inevitable, but this release does move things on apace.

The addition of Sync Tech to sheet metal makes huge sense and it’s been very nicely implemented. The work done to fix some of the problems (particularly controlling draft edits) also indicates how things are going to pan out in the next few years. I expect that Sync Tech will merge with more traditional modelling methodologies and the system should evolve nicely. The introduction of the Solid Edge Simulation product also shows that the development team isn’t afraid to pull in technology from other areas of Siemens to the benefit of the community.

In summary, the release of Solid Edge with Synchronous Technology 2.0 shows that Siemens PLM’s Sync Tech is developing very nicely, not only making the technology easier to use but helping make light work of often complex processes such as sheet metal design. A good solid release. No pun intended.

www.siemens.com/plm


Intelligently reusing 2D drawing views

From as far back as I can remember, the development team behind Solid Edge has continually done interesting things to try and help users make the most of their legacy CAD data. This latest Solid Edge release sees the introduction of a new tool that allows ST tools to work with 2D drawing views to quickly create 3D parts - but manages to retain the intelligence found in the original 2D drawings.

First bring in the views from the 2D CAD data (Solid Edge reads the most common formats, DWG, ME10, DXF etc), then strip out the unwanted layers (such as title blocks etc.). Then using a ‘glass box’ approach, position the 2D geometry in 3D space.

The Sync Tech-based tools find regions within those views and pull them into shape. If the views are lined up correctly, accomplished using Fold Lines, these can be used as snapping guides. For many parts, this can be done in an orthographic projection, but the good stuff happens under the hood.
Assuming the views are defined correctly, the system will also extract the dimensions and associate them with the model features, driving its form. It’s a very elegant way to take 2D geometry and bring old designs to life in the 3D world for reuse or adaption.

Comments on this article:

Autodesk Inventor 2010

26 June 2009

Process types: Design, Manufacture, Simulate and Visualise

Inventor 2010 is one of the most significant releases in the product’s history. With new assembly-based simulation tools and plastic part and mould design technology, Autodesk is moving closer to fulfilling its digital prototyping vision, writes Al Dean

Product Inventor 2010
Company name Autodesk
Price from £4,200

Inventor began life alongside Mechanical Desktop but now reigns supreme as the flagship product of Autodesk’s Manufacturing Solutions Division. In the near decade of its development, the system has moved from being a standard 3D modelling and drawing creation tool into a comprehensive design and simulation system and is now showing signs of becoming a capable manufacturing solution as well.

Through a series of acquisitions (Moldflow, Solid Dynamics, Plassotech and Algor), the company has been arming itself with a range of technologies that are only now starting to be added to the Inventor Suite of products. All of this is particularly evident in this latest 2010 release, where Autodesk has delivered enhanced simulation tools and plastic part design technology into the core Inventor product, mould design technology for Inventor Professional and the new Inventor Tooling Suite (which we’ll be concentrating on this month).

Inventor now includes a range of features that automate the creation of common, but complex plastic features, such as lips/grooves, mounting bosses, and grills

In line with these new developments, and helping bring the new functionality together in one consistent environment, is a new user interface based on Microsoft’s ubiquitous Ribbon. The new Ribbon-based User Interface (UI) is going to come as a bit of shock to existing users as pretty much everything has been re-arranged and, excuse my language, ‘ribbonised’. Commands and operations have been moved from the left-hand portion of the screen and reorganised into discreet panels that run across the top of the UI. The good news is that the work done sees the system reorganised so commands and feature-sets are presented in a very logical and workflow-centric way. The standard panels present groups of commands for sketching, feature-creation, assembly modelling and draughting. There are also additional panels for system options and variables (such as window control and display settings) as well as a whole host of learning tools that are going to be invaluable as users settle into the new environment.

Tool tips have been expanded and give users progressively greater amounts of information about commands as they hover over each icon. There’s also a direct link to the help system found in the quick access bar at the top of the interface.

Alongside the new ribbon UI, there are some key new pieces of functionality that are worth a mention. Inventor users should already be familiar with the ViewCube, which has been introduced progressively into each Autodesk product to provide access to standard views quickly. Below this there is a short vertical strip of view manipulation tools that let users set views, shading, and toggle between orthogonal/perspective, among others – all located in a very handy place.

Now, that’s the new UI dealt with, let’s look at the new functionality. Inventor 2010 is a pretty comprehensive update, so we’re going to look at the product in stages. This month, we’ll focus on the new tools for plastic part design, then deal with other areas in the next issue. Ready? Let’s go.

Mould base development is based on standard catalogues from the major suppliers but tools to adapt these to suit specific requirements and applications are also provided

Plastic fantastic

A major focus for this 2010 release is the design and manufacture of plastic parts, specifically injection-moulded parts.  What’s interesting is how well developed the set of tools are, taking users through all stages, from the development of the parts through to core and cavity preparation, right into the realms of mould-base design.

In terms of new tools for Plastic Part design, the technology is based on development work done by Attilio Rimoldi (founder of ImpactXoft) and offers an intelligent method of creating plastic parts. This intelligence is not only in terms of how a history-based system handles and maintains a constant wall thickness, but also in terms of adding an impressive range of knowledge-based plastic part features that support the industry’s language and geometry types. The real key is the knowledge-based nature of these tools. They automate the creation of plastic part features that would previously have been repetitive and laborious to accomplish manually. The basic feature set for this release is mounting bosses (for fastener support and component mounting), grills and vents, snap fit hooks and loops, lips/grooves for part interfacing, rest features (where complex forms are required, again for mounting components or adding functionality to a part) and finally, rules-based filleting. Let’s look at a few examples to illustrate how they work.

Snap fits are common in many products and can be incredibly hard to model manually, particularly when they need to interface with complex forms. The Inventor Snap Fit feature provides an automated tool for creating both hook and loop type features. Once the basic positioning requirements are defined, the system builds the preview and allows adaptation of that form to achieve the required shape/functionality.

Another is the creation of mounting bosses. Open any injection-moulded component and you’ll find a series of plastic bosses. These are used to hold internal components, such as PCBs, in place and external forms together. Inventor provides a single feature operation for the creation of such features with a number of options to satisfy both functional and aesthetic requirements.

A final one worth exploring is rule-based filleting. These differ from standard fillets in that they are not assigned to specific model edges. Instead they are assigned to a feature (such as a pocket or boss) and the system calculates which edges need to be filleted with the user controlling how they are applied. While for simple geometry this won’t make much difference, the power of rule-based definition comes into play when handling complex design change and complex forms, as it makes the rebuilding of those features more robust.

Core/cavity to mould base

As with many features and functions within Inventor 2010 the new Tooling technology has been public knowledge for some time. However, rather than having been tried, tested and refined on the Autodesk Labs web-site (labs.autodesk.com), the technology has been on test in some of the most hectic tooling-heavy countries in the world - namely, China and Brazil. After all, if you have a new set of tools aimed at such a specific industry sector and working process, it makes sense to test it in an environment in which it’ll see a great deal of usage. While those directly involved with tooling design will be aware of many of the processes involved, Inventor’s new Tooling technology brings real benefit to those either making their first steps into developing moulds in 3D or those looking to gain a better understanding of the process so it can aid their design for manufacture knowledge.

With the new plastic part design tools and Moldflow functionality, Inventor now offers an environment in which to take your first steps into design for injection moulding

There is also the fact that, due to the rising costs and scarcity of many previously low cost and abundant materials (particularly metals), many designers are now engaging in plastic part design for the first time. By combining the new plastic part design tools with the full suite of design-to-manufacture preparation tools we’re exploring here, Inventor is now offering a capable environment in which to take your initial moves into design for injection moulding.

The process begins with the orientation of the part in question followed by the definition of material characteristics, and this is something particularly worthy of note. With the acquisition of Moldflow, Autodesk gained access to a much more extensive set of materials information (the company even has its own certified materials testing lab). This is now available within the Inventor Suite and there’s access to the fully searchable (by vendor, trade name, property) database of plastic materials, from which users choose a suitable plastic

Following this, features are added to the core and cavity, such as gate location, part processing settings and shrinkage. While users’ own knowledge and judgement can be used, the Moldflow tools also can be used to suggest alternatives. The key thing to remember is that these are guidelines and your moulder operator or supplier is likely to have a much higher-level of knowledge and know the intricacy of the hardware and the material and how they can be combined to achieve the desired results. At this stage, collaboration with your manufacturing team can certainly pay huge dividends. While these tools let users make a more informed decision, it has to be tempered with experience.

Once done, the work-piece size is defined and the geometry to split the mould insert or plates is created. Patching surfaces (shut offs) and run-off surfaces are created automatically, from the split-line. The automatic results will work for simple geometry but for more complex parts, users may need to adjust the surfaces or construct some manually. The final stage is to create the core and cavity solid bodies. Here Inventor uses all of the input for shrinkage, gating, shut-offs/runoffs to split the core and cavity. Everything is fully documented (including reports from any simulation runs performed). Next up is the creation of the mould base.

Inventor 2010

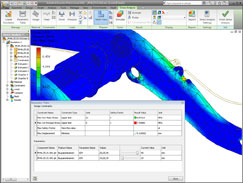
Since the acquisition of Moldflow, Autodesk has integrated simulation tools and materials libraries that allow users to discover how design and material decisions influence manufacturability

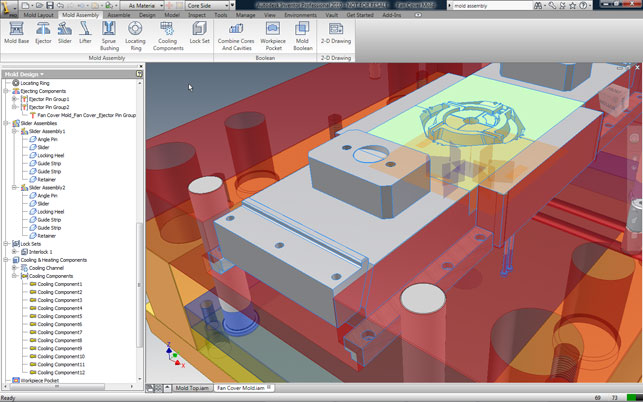
Again, the process is well defined as users move from defining patterns required for multi-part moulds, through definition of runners, gates, cold wells and cooling. As is common within tooling-focussed systems, everything is driven predominately by standard catalogues (Inventor Tooling includes DME, HASCO, Futaba, and LKM libraries) but custom sizes can also be created, depending on the project requirements. Once the basic mould configuration is in place, then users can move on to adding the components and sub-systems that make the system work such as ejectors, sliders and lifters to enable the moulding of undercut or complex features. Hardware is then added to link up the moulder, such as sprues and locating rings, or specific elements for cooling channels. The system provides a mix of tools that allow users to define these features automatically or dive in and add the geometry manually. Again, the integration of Moldflow technology at key stages lets users validate their decisions or they can have the system suggest new potential. Once happy with the mould they’ve designed, users can carry out the final 3D work to consolidate the core/cavity with the remainder of the mould tool.

There’s plenty of support for the various different approaches typically used, whether that’s a single piece plate to hold the part form, or single or multiple inserts for multi-piece moulds. Inventor has three different options to get the required form, and to add all of the various cut outs to ensure things are production-ready. Once done and ready, users can then move onto create the 2D documentation that’s required, not only for manufacturing, but also for assembly by shop floor staff. Inventor already has a wealth of 2D documentation tools and while there’s no way to automatically generate exploded views, users have the benefit that representations of the assembly are available (such as core half or cavity half, cooling channels and such) and much information can be extracted from the rich 3D model and the associated metadata.

In conclusion.. for now

What’s we’ve looked at this month is a very task- or process-specific set of updates made for the Inventor 2010 release. While the UI changes will come as a shock to the system for many existing users, I have to say I’m impressed with how it’s been implemented. While I’m not a huge fan of the Ribbon toolbar, you have to admire it purely for its ability to concentrate your mind on the task at hand. The interface adapts to the process or task you’re working on and I found there’s much less hunting around for icons.

Inventor 2010

Inventor 2010 features a new user interface based on Microsoft’s ubiquitous Ribbon, which helps bring all the new functionality together in one consistent environment

As for the huge amount of work done to support not only the design of plastic parts, but the process of taking them through to production, I have to say that I’m impressed. It’s clear that these tools have been developed in a pretty rigourous and consultative manner and while many mainstream vendors have dipped their toes into mould design, it’s always been the specialists that have ruled the roost. But perhaps no longer?

I would hazard a guess that CAM is also going to feature quite heavily at some point soon. While there are many CAM vendors that integrate and integrate well with Inventor, you do have to wonder what the system would look like if Autodesk acquired a CAM developer and integrated those tools in a similar manner.

In terms of Tooling, by combining the new plastic part design tools with an impressive level and wide ranging integration of tools from Moldflow, Inventor is now offering a capable environment in which to take your first steps into design for injection moulding.

But what if you’re not directly involved in tooling design? Is there ground for adoption of these tools? In addition to offering real benefits to those making their initial moves into developing moulds in 3D, Inventor’s new tooling technology can certainly help designers get a better understanding of the process so it can aid their design for manufacture knowledge.

More next month when we look at the core updates for machine design, simulation and analysis. Stay tuned.


autodesk.co.uk/inventor


Coming up Next month: Analysis and simulation

Inventor used to rely on a parts-only Ansys-based technology for in-built simulation. This has now been replaced by Finite Element Analysis (FEA) technology from Plassotech, a company Autodesk acquired a couple of years back.

Inventor 2010

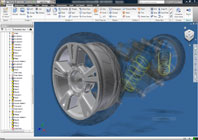
Finite Element Analysis (FEA) is introduced into the core Inventor product allowing for full assembly analysis

The technology has been introduced into the core Inventor product and allows for full assembly analysis. This can be driven from manual inputs, but a more intelligent way of working is to use the assembly simulation tools. These can be applied to work out how loads transfer between components in motion and with respect to time. That data can then be used to find maximum loading conditions and transfer all of the forces and loading data to stress analysis. It’s obvious that a lot of work has been done in this area, and one thing particularly worth highlighting is the breadth of optimisation technology now available.

While most FEA systems include some form of optimisation, Inventor now allows users to conduct design experiments where goals, parameters and variables for optimisation can all be defined, and various techniques used to find a smaller set of studies that will help get users as close to their goals as possible. It’s quick to find the variables that have the greatest effect and influence on the performance of the design, enabling the user to narrow down the geometry and get closer to the optimal in a shorter space of time. The review is can be found here.

Comments on this article:

Dimension Printing uPrint

12 June 2009

Process type: Prototype

If there’s one organisation driving more affordability in the rapid prototyping market, it’s Stratasys’ Dimension Printing business unit. Al Dean takes a look at its new uPrint 3D printer, which brings ease of use and affordability to the fore

Product uPrint 3D Printer
Company name Dimension Printing
Price From £12,500

Stratasys (Dimension Printing’s parent company) made its mark in the rapid prototyping world when it introduced the Fused Deposition Modelling (FDM) process that’s is now at the heart of all of its products.

Like most rapid prototyping systems, FDM builds 3D models sequentially in thin slices. But while other systems use powders, resins, lasers and other optics, FDM uses a filament of extruded material to build its 3D model. Where SLA (Stereolithography) traces the outline of a part layer then fills it in, FDM deposits near molten material from a nozzle, tracing the exterior boundary of each layer then zig-zagging within that to add the material.

FDM models are renowned for their toughness and accuracy making them suitable for physical testing

In most FDM machines the system also deposits a support material to assist with maintaining form within the model during the building process and to allow users to build complex parts in the required orientation. This support material is then removed (it’s water soluble) and hey presto, there’s a 3D model, realised as a physical 3D part.

The benefit that FDM has traditionally held over its competitors is the superior structural integrity of the parts. By using near molten material (typically ABS but others are available in the higher-end systems), the technology gives users a very good approximation of product-intent material. Parts are more resilient, suitable for form, fit and function testing and generally stand up well to the rigours of life as a prototype part. So, there’s the background, now let’s looks at the specifics of the uPrint machine, which Dimension is touting as a personal 3D printer.

Personal service

The uPrint is a very small form factor machine and it sits easily on an office desk. I would hazard a guess that this is about as small as these things are going to get considering it sports a very usable 203 x 152 x 152 mm build envelope. Installation is very similar to that of a traditional printer. Everything is clearly labelled and there’s even a quick reference guide.

uPrint

The part in SolidWorks – an STL file is exported to the required resolution. Higher resolution will mean much less faceting in the final model

The machine comes into two core parts: the printer itself and the material bay. The material bay sits underneath the printer and can be doubled up to offer longer periods of unattended model building. Once it’s assembled, you connect the machine via Ethernet and get the software up and running.

The system comes with Catalyst EX software which offers all you need for model preparation, from machine admin and control, through STL data import, orientation and scaling tools to prepare each build job.

Inside each material bay the ABS and support material are held in reels of filament, which are fed directly into the nozzle. These are 0.254 mm in diameter and this dimension not only defines the layer thickness during the build process, but also has an effect on the resolution. While FDM models are known for being dimensionally accurate, when working with intricate detail (close to the 0.254mm dimensional limit), it is possible to run into problems. That said, judicious choices made when orienting the part, can certainly help achieve the desired level of detail.

uPrint

The part in Dimension’s CatalystEX application, which allows users to define a range of build parameters

At present, the uPrint only has one material option - Dimension’s ABSplus - and it’s only available in ivory (or off white). While the material is actual ABS, it’s important to realise that the exact same production intent characteristics of injection-moulded parts will not be achieved because of the inherent weakness of the layer-based build process. Still, compared to some 3D printing methods, these are exceptionally hard-wearing models and you can do most things to them including, milling, drilling, painting and even electro-plating.

In terms of the actual build process, models are built up layer by layer directly on to a ‘disposable’ model base. While Dimension discourages re-use of these bases, it is generally perfectly acceptable.

Build speed is not exactly fast, but comparative to other 3D printing systems. For example, the test model we supplied (see Figure 1) has a biggest dimension of 100mm and took 13 hours to build.

At the end of the build process, little post processing is required as the support material is water soluble, but an optional clean station is also available that automates support removal.

Parts are more resilient, suitable for form, fit and function testing and generally stand up well to the rigours of life as a prototype part

Cost of ownership

The uPrint represents a step change for Dimension Printing. The company has seen huge success with its range of BST, SST and Elite 3D printers and has shifted a huge amount of units. The competition between Dimension Printing and its arch-rivals Z Corporation and Objet, has helped drive down the cost of 3D printing technology over the last few years. But the introduction of the uPrint takes this a step further.
The start price for the uPrint is £12,500. This gets you the machine, one material bay (plus a carrier for both build and support material), the Catalyst EX software, some build and support material to get started and a year long maintenance contract. If you want to add the additional material bay, that costs £1,275 and material carriers for both build and support materials are £250 each. The optional clean station costs £2,250.

While the capital costs of the system are critical, you also need to bear in mind the on-going costs of owning and maintaining one of these machines. A year’s maintenance is included with the device, with additional years being £1,600 per annum, and I’d certainly recommend this. Even though the technology is comparatively simple compared to other 3D printers, the last thing you need is a spool jam or blocked nozzle when you have a project deadline looming.

uPrint

Available in red, green and white the uPrint is much smaller than many 3D printers and set-up is incredibly simple, taking inspiration from 2D printers

In terms of consumables, the ABS plus material costs £690 for five spools. The support material is the same price and while you won’t typically use as much as you will build material, it can vary depending on the form of your parts. Other than that, the model bases cost £115 for 24 of them.

In terms of raw material costs, the part you see in Figure 1, which has a biggest dimension of over 100mm, cost £27.51 for the build material and £12.33 for the support, so all told around £40.

Just out of curiosity, I ran the same STL file through a number of online service providers and the lowest quote I got was over £300. Now, while I’m no accounting expert and understand that capital costs need to amortised, if you’re a heavy user of rapid prototyping and maybe already invest heavily in outsourced FDM model builds, being able to recoup the cost of the machine in around 50 builds or less seems very good value.

Conclusion

When looking at overall running costs the uPrint presents solid value for money. It’s also an extremely well-engineered product and the models, made in durable production intent ABS, are impressive.

Bringing 3D printing in house is a big leap for some, but it can bring huge benefits to the product development process. Because the design team has the machine to hand it will use it to its fullest potential, rather than erring on the side of caution when outsourcing. After all, if you purchase a tool, you need to use it more to get more value from it. No hassle of getting purchases signed off, no waiting for the FedEx man to show up with a package of broken bits, just the ability to fabricate your prototype models and get on with the job.

If you want another perspective on the uPrint, I’d suggest you download Lou Gallo’s SolidWorks HEaRD podcast (solidworksheard.com). He has a nice audio-based introduction to the uPrint, from unboxing to test builds.

uprintTech Specs

Machine dimensions (W x D x H) 635 x 660 x 787mm
Machine weight: 76kg (with single material bay) 
Build envelope: 203 x 152 x 152mm  
Layer thickness: 0.254 mm
Build method: Fused Deposition Modelling (FDM)
Model material: ABSplus (single ivory colour)
Network connectivity: Ethernet TCP/IP 10/100 base T)
Support removal: Water soluble (optional cleaning station)

Comments on this article: