

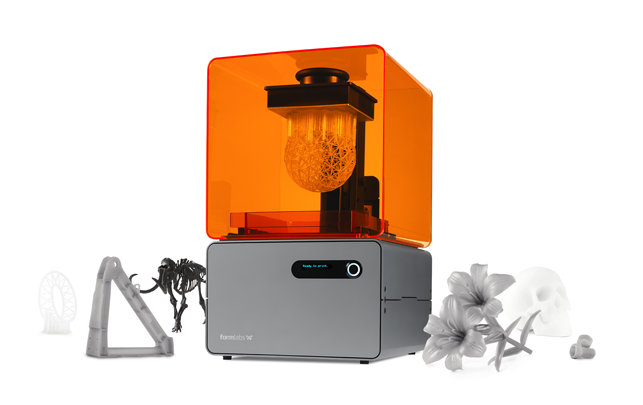
We’ve got our hands on a FormLabs Form 1+ 3D printer for some proper testing
When you look at the swathe of verbiage about 3D printing out there on the internet (and elsewhere), there’s much noise and not much signal, to be frank.
While there’s all manner of punditry, hype and general horse shit spat forth, there’s very little in the way of first hand documentation of how these machines work, what you can expect from them (other than a fancy new Yoda head statue) and what day to day life is like with them.
We’ve always tried to get our hands on these machines, live with them for a little while and give you thoughts on how they work, what they can do. The problem is that it’s not often that a vendor is willing to send you a couple of grand’s worth of hardware and let you have at it.
That issue is often exacerbated by the simple fact that many of the desktop machines are a massive pain in the knackers to set-up, to maintain and to get decent efficient results from.
Something I talked about at DEVELOP3D Live last year for those that made it (If not, the talk is online).
So it was with some delight that we managed to talk fine folks at FormLabs into lending us, for the period of two weeks, one of their brand spanking new Form 1+ machines.
We’ve heard good things from several folks that are experienced with the gamut of the 3D print technology out there and they seemed to rate them, so curious we were.
The machine turned up midday or so today, so here’s a run down of our experience so far.
Step 1: Get the box in your door
While the FormLabs machines are desktop bound (about the foot print of a laser printer), the box that it arrives in isn’t.
It’s huge and for good reason. Inside are three more boxes.
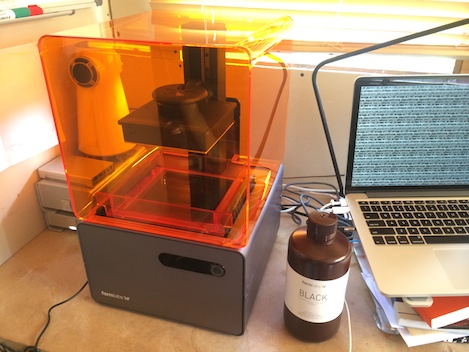
There’s the big one for the machine itself, then another one for the materials (we’re running with the brand new black resin) and another for the post process and clean up station (more on that, tomorrow I suspect).
While many desktop level machines arrive, to a greater or lesser extent, as a self assembly kit that then needs hours of assembly, levelling and adjustment, the Formlabs machines arrive calibrated out of the box.
Once you’ve worked out how to extricate it from the packaging, found all the various pieces of clear tape that hold the components in place, you’re pretty much ready to start doing some work with it.
Hint #1:Watch out for the elastic tape that holds the build tray and make sure you’ve got it all out before starting to print.
Also, keep ALL the packaging material. I tend to photograph things as they come out of boxes – so I know how to put them back in again.
The Formlabs machines are return to manufacturer warrantied, so you’ll need the boxes and an idea of how to pack them up should the worst happen.
The good news is that warranty returns are now handled for Europe, through the Express Group, so it won’t cost you $500 to send your machine back.
Hint #2:Make sure where you’re putting this thing is level. Unlike the filament based machines the Formlabs machines use UV curable resin and, as such, it’ll swill around a bit and works best when it’s not pouring into the internals of the machine. If you’ve got an iPhone, your compass is perfect to assist.
Once you’ve got the machine unpacked, you’re about ready to rock. Plug the machine into your workstation and get the software set-up (it’s worth downloading the PreForm software and seeing what it looks like).
As ever, the set-up software is always the key to getting a decent result from your prints. Formlabs’ PreForm is pretty slick, particularly if you’re used to arsing about with a lot of the entry level machines. You load up the STL you want to build and it’s placed on screen in a default orientation.
Step 2: Software is fundamental
Now, because of the way that the Form machine works you need to ensure, perhaps more critically than other systems, that the orientation is matched to the geometry.
Handily, there’s a well prescribed workflow to progress through.
The first step is to have the system orient the part. As the machine works by building from the base of the unit, through the material, the parts are essentially suspended from the build platform.
The software will orient things nicely as a first pass. If you’re particularly concerned with details on a specific set of faces (surfaces, perhaps on an electronics housing), then you can rotate the model and rerun the orientation process and get a match that better suits your needs.
There’s also a handy tool to assist with orienting your model, so you’ve got the faces you want facing the supports (the “Select Base”).
It’s also worth noting that, while the obvious route is to have the system build flat faces (perhaps those that interface or mate together) as being aligned with the build platform, there’s a slight fly in the ointment.
The build process uses capillary action and a peeling mechanism combined with raising and lowering of the build platform to achieve the correct layer thickness.
As such, there’s always going to be an element of suction as the resin is trapped between the platform and the base of the resin tray.
If you’ve got too much in the way of a flat surface, this can cause issues with the whole model (or portions of it) pulling off and the whole build failing. This is why the machine tends to orient parts at 40 degrees from horizontal.
PreForm gives quick tools to orient your parts in a manner that suits both the build process and your requirements in terms of surface quality
Once it’s in position, you then need to create the supports – again, these are key to having the model build nicely.
If you’re used to FDM machines at the desktop level, you’ll be used to these being pretty rudimentary. In the case of the PreForm software, it’s more intelligent, gives you a nice support structure with tips that only just touch the software of the part (which is, again, a key to why getting the orientation right is so important).
These are all user controllable to a point, but we’ll run with the defaults for now, then get into support editing and placement a little later on.
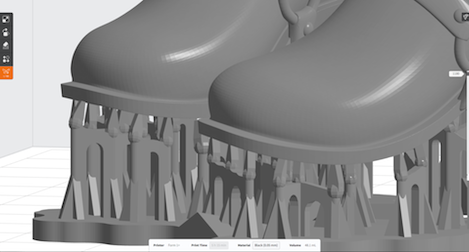
The supports generated from the software give support where needed and are generally pretty usable – and are customisable when you’re ready to step up your game
To try out the machine as a first pass and get a feel for how it works, we wanted to try it with something relatively small but useful, to see how details (remember, this is SLA territory, so fidelity of prints is a given) replicate and how the post processing works before committing to something longer in terms of build.
Step 3: Build something, punk!
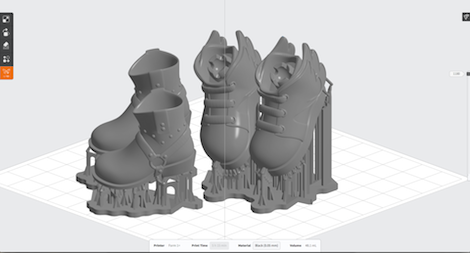
For our first part, we chose to build a new set of boots for the office Makie doll. If you’re not familiar with these things, they’re the first 3D printed, fully customisable dollsl from our friends at MakieLabs. Handily, those lovely folks give away a couple of designs for new footwear for those that want them.
Once we’d gone through the process of orienting them and generating the supports, we were ready to go. If you’ve got a crowed platform for building, then there are additional tools for automating and tweaking the layout of multiple parts (but we didn’t need them in this instance).
To set the machine building, you pour the resin (it’ll hold 200ml from a 1l bottle), let it settle a bit, then hit the Form button in the software. This starts the transfer process and the model is sliced and sent to the machine. When it’s ready to build, you have to confirm with a push of the button on the front of the unit and away it goes.
It’s worth noting that this machine doesn’t require that you have a workstation plugged into while it’s building – just while it’s sending the data.
In the case of this build, that took 10 minutes or so, and we were notified via the software that it was OK to unplug the mac and let the machine do it’s thing while we cracked on with other jobs at hand.
So, with that done, we’re sat here, listening to the machine whirl away.
Initial impressions
First impressions are good. The machine has an interesting audible characteristic.
It runs silently while the laser is tracing each layer, then a few seconds of whirring while the machine peels away from the just built layer and readjusts for the next.
Compared to FDM machines that many might be familiar with, it’s much quieter and, after a while, you don’t really notice any noise at all. In a busy design office, you won’t notice it at all, above the usual noise.
For those that know their ambient noise, it runs at about 60 dB close to the unit.
Another benefit is that there’s no perceptible smell from this machine at all. Something that desktop FDM users will be more than familiar with.
At present, the first build is chunking away. We’ve got 75 minutes to go:
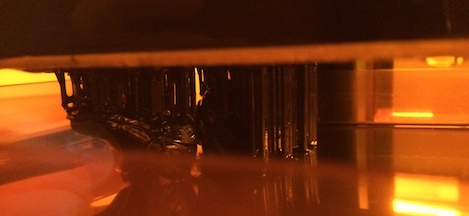
Check back tomorrow to see what the results are like, how the first post processing walk through goes and how it’s going.
If you’re into the twitter thing, then Al is posting thoughts and photos as he goes. You can check on on the hashtag #168dayswithaform1


