

In a bid to keep you up to date with what’s going on with the various cloud-based services and applications, we’ll be taking a more regular look at each major release or update as they roll out. If there’s one change that the rise of cloud-based applications will bring, it is the need to stay on top of things – annual or service pack releases force you to look at what each contains and find areas where you can change your workflows – when those updates happen pretty seamlessly, that’s going to become more of an issue when they’re every month or so.
So let’s begin with a look into what the March update of Autodesk’s Fusion 360 has to offer. We’re highlighting 6 of the big ticket items, but there’s a good anount of documentation for each release, available in the online help (which is here).
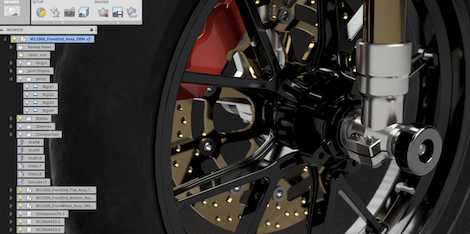
#1: McMaster Carr integration
While it’s a predominately US led sourcing operation, McMaster Carr is renown world wide for supplying all those fasteners, gears and a whole host of other components. What Autodesk has done is integrate the company’s existing online catalog directly into the Fusion interface, with some clever jiggery pokery that makes the whole process much slicker.
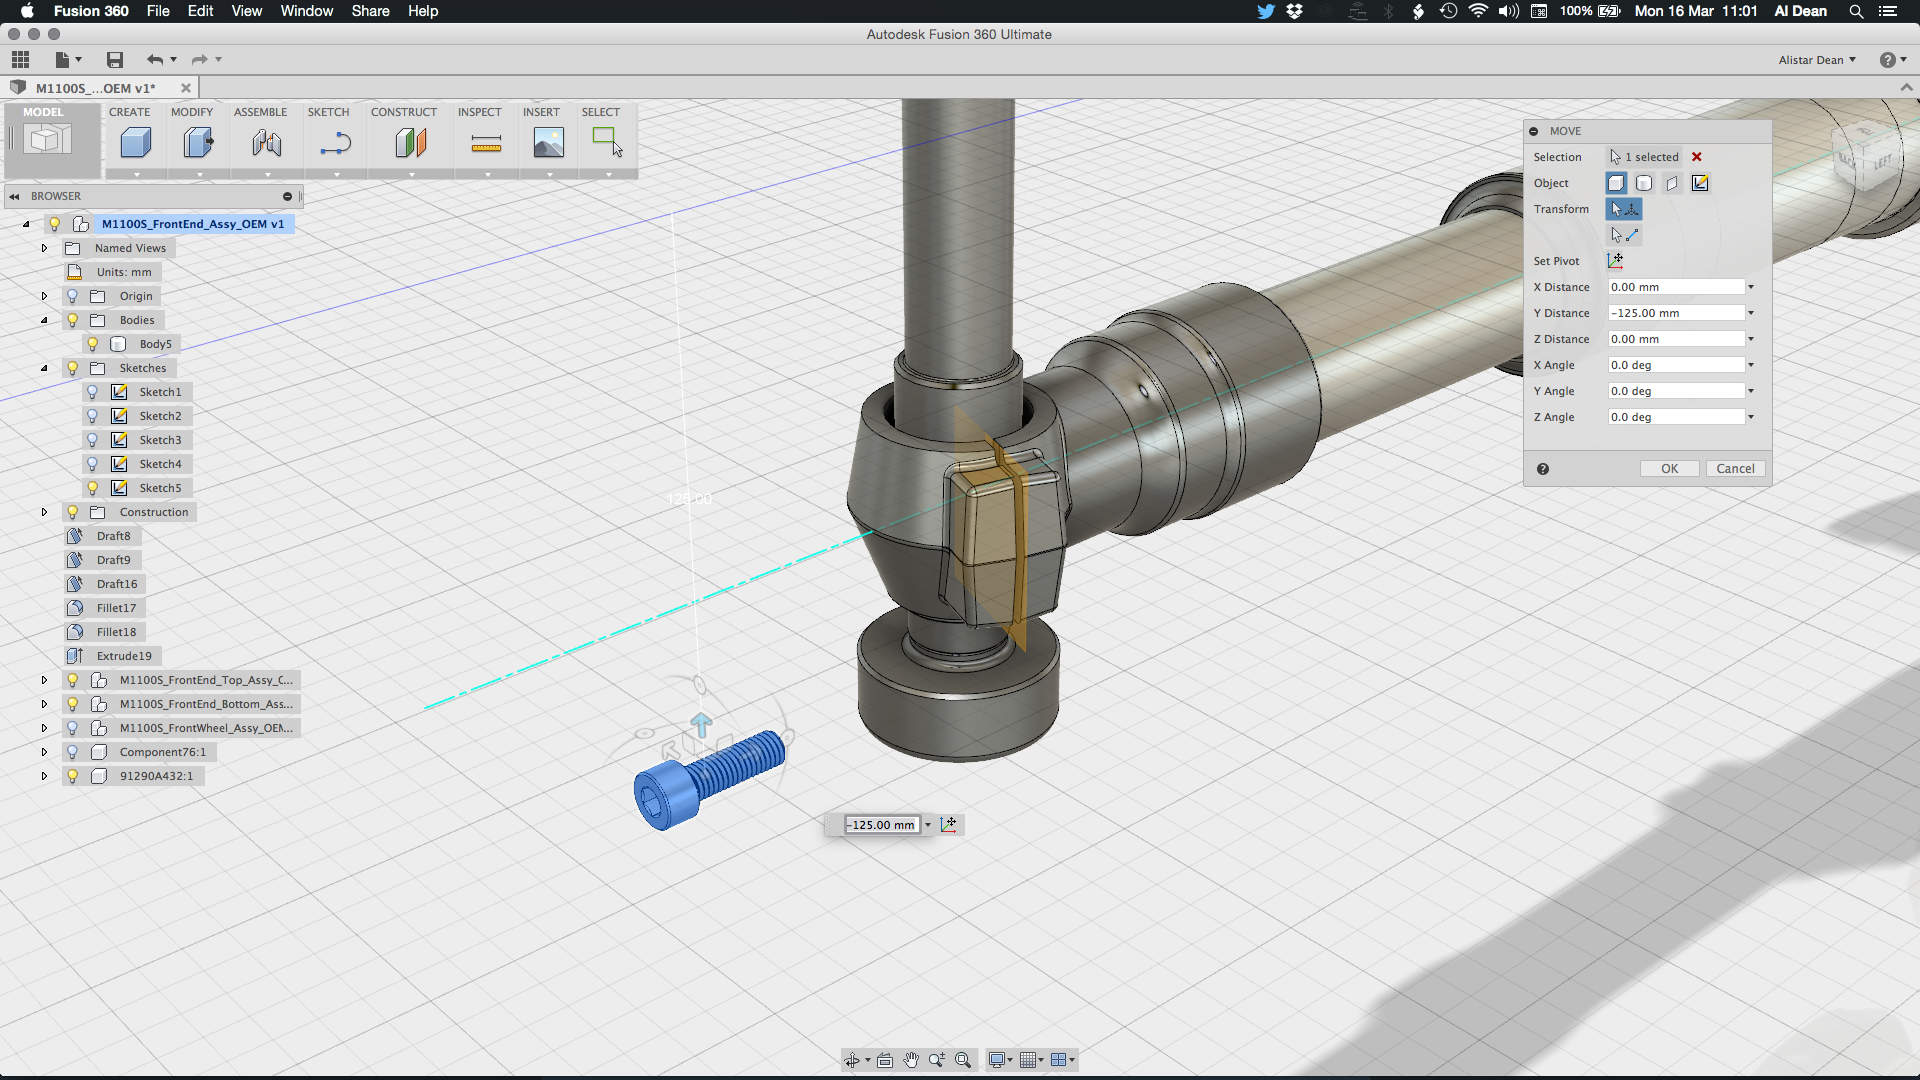
You’ll find it under the Insert menu (Insert McMaster Carr) and that’ll kick off a Fusion window that connects directly to the website. You’ll then use the usual filtering, browsing and searching tools to find the component you need – in our example, an M8 x 25mm socket cap screw. Once you’ve found it, click the part number and you’ll get to the part details page. If there’s CAD data available, you’ll see a small symbol indicating that it’s available. Hit this, and you’ll get a technical drawing as well as a drop down that shows the formats available.
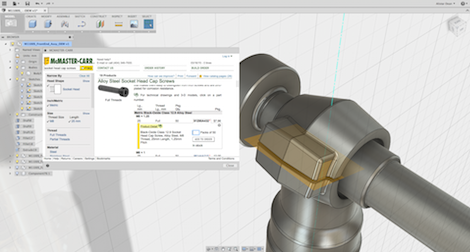
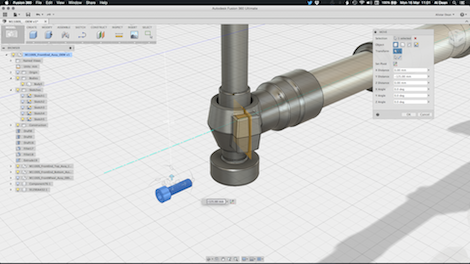
Fusion will import most of these (even in the native ones). STEP is a good way to go. Hit the Save button. Whereas if you’d have done this in a browser, you’d have ended up with a downloaded STEP file, here, the data is transferred directly to Fusion is placed directly in your current model – for positioning and replication where needs be. The part is added to your assembly as a part and the part number is added from the catalog too.
#2: Cloud-based rendering
If you’ve missing it, Fusion got a rendering mode in the December release and it has been worked on subsequently. There’s a number of updates since and you now have things like Depth of Field. It’s a nice implementation that gives you a way to quickly throw materials in a model and hit render. There’s a couple of modes – the basic mode will give you a CAD style render, with all of the construction geometry, edges turned off.
Fusion’s basic rendering mode gives you a clean model and realistic materials as defined – ideal for collab sessions and maybe screen sharing.
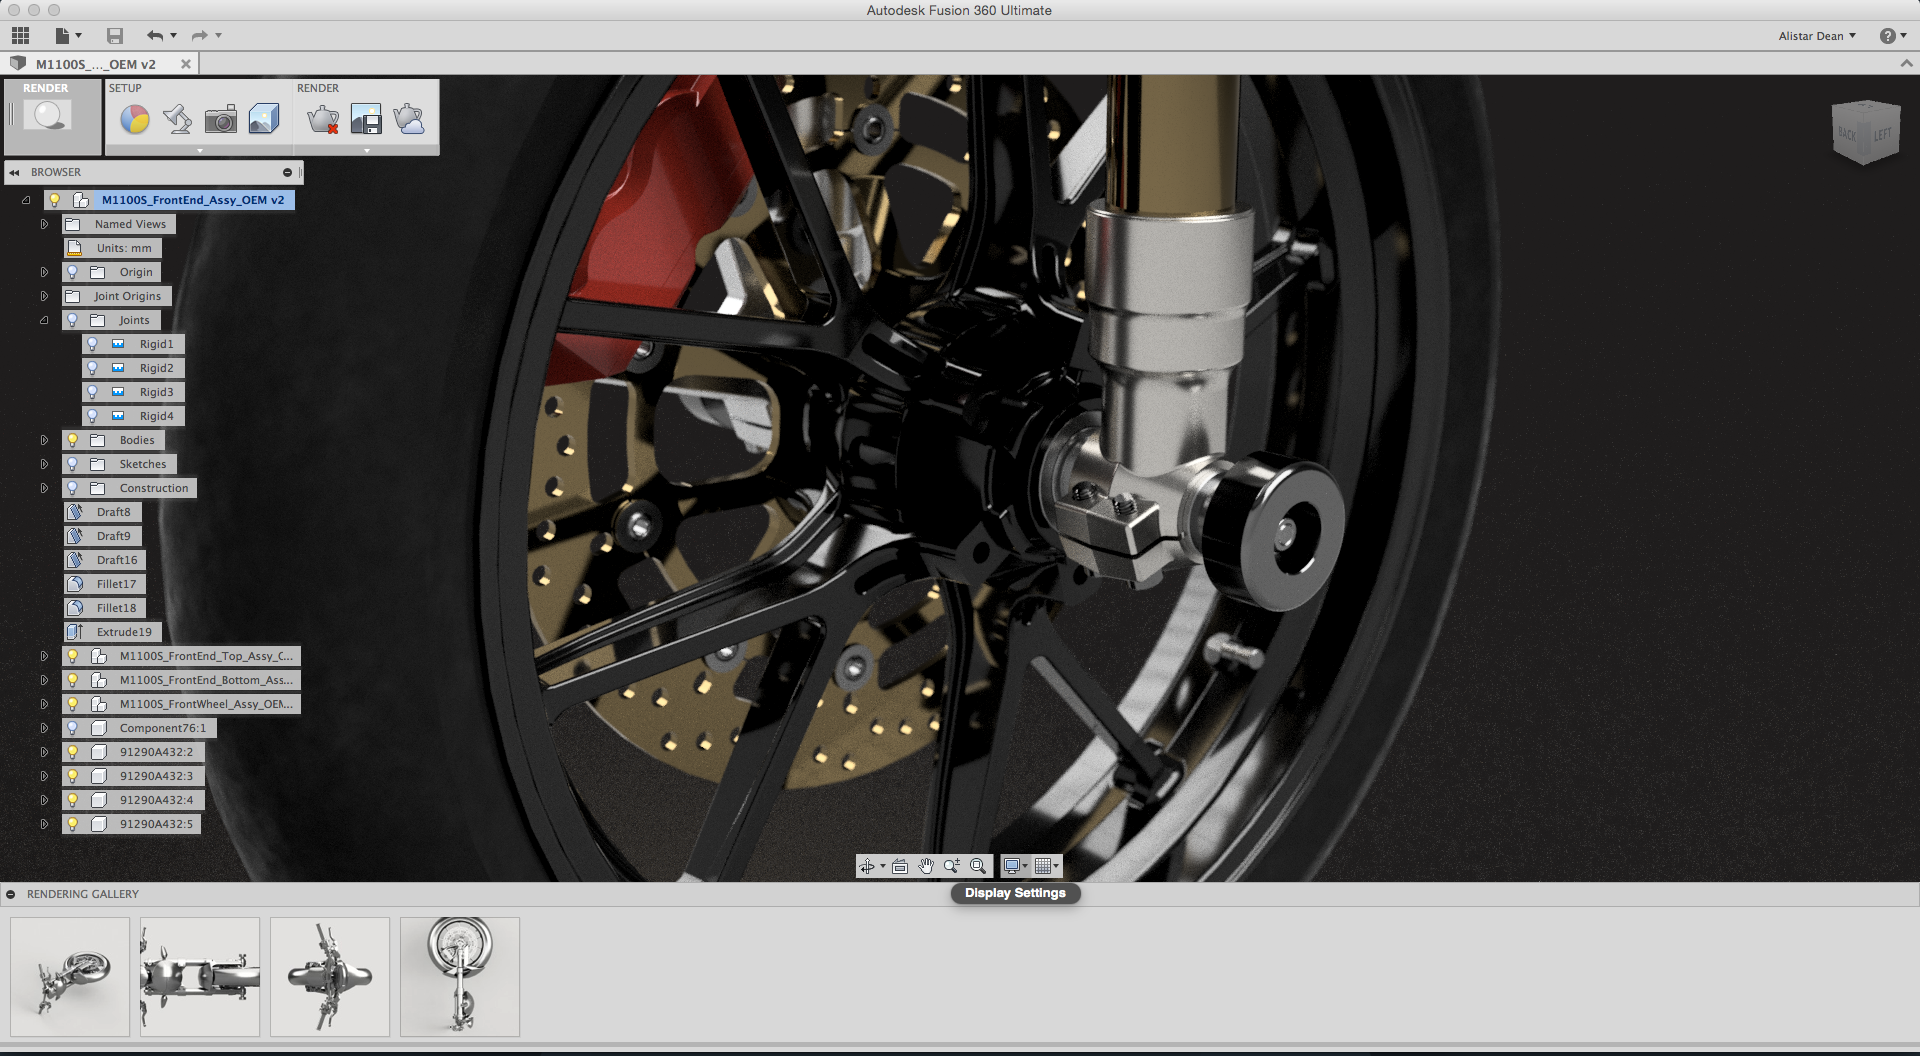
That’s nice for a quick sit down around a monitor or a Skype session to show off a model, play with colours and such. If you then hit the Ray Tracing button, you’ll get a heaver calculation, but which features all of the shadows, reflections and now Depth of Field you’d expect (and within that ray trace mode, there’s a couple of levels – the advanced giving you the best results as shown below). If you want to save out an image (and don’t forget, Fusion also now includes animation) you can, but it’s only to your screen resolution or thereabouts.

Switching on the ray trace mode gives you a locally calculated render – this can be saved out to screen resolution only.
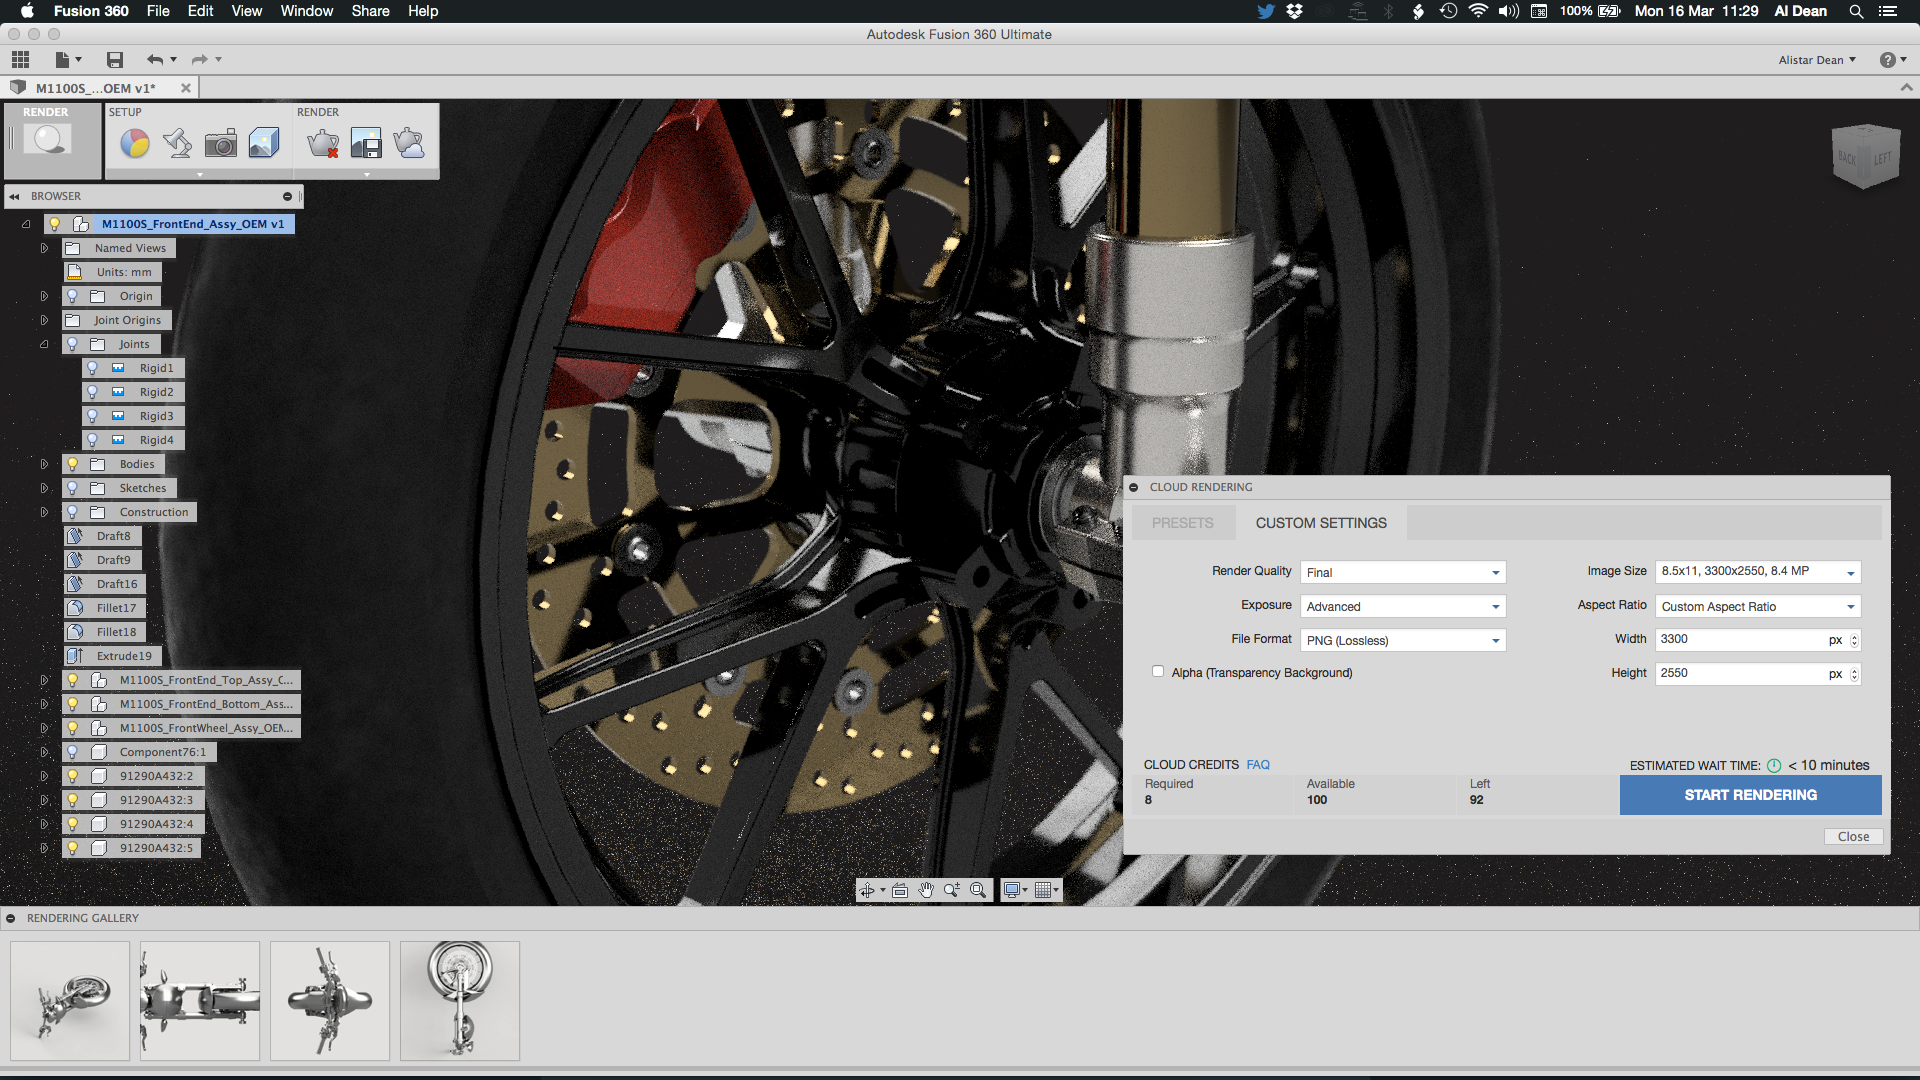
The March update brings cloud-rendering. Essentially, this uses Autodesk’s A360 rendering tools to give you more options (in terms of image resoultion, DPI and such) and with a fully calculated scene – so you don’t have to tie up your resources locally. The implementation is a first pass but looks pretty nice. There’s a new icon. Hit that. You then give the service your requirements in terms of quality of calculation, the image resolution (it includes a nice list of presets for screen size, for print and web as well as device sizes). At the same time, you get feedback about the number of cloud credits you’ll need and the time expected to begin calculation (This is worth exploring a little more, shortly),
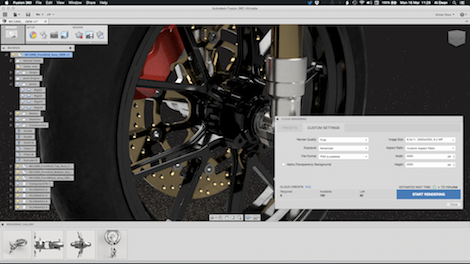
The Fusion Cloud Render dialog – based on A360’s rendering service, gives you all the controls you need over aspect ration, image size, DPI and to a nice selection of presets for different media/devices and such
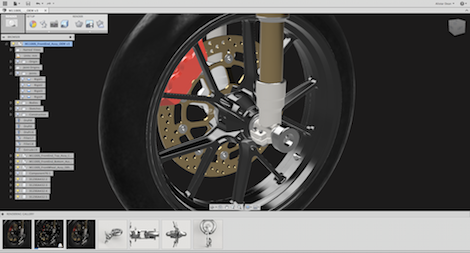
Once submitted, it’s added to the queue and you get feedback on how long it’ll take. The job is then added to the ‘gallery’ at the bottom of the screen and you can monitor its progress. Once it’s done, you can then inspect the results and see what you’ve got, download it (strangely, there’s no option to automatically make this image available on your project folders – which would be handy I’d have thought).
We tried it out with our favourite test model, had some nice materials and a bit of depth of field included and the results came back quickly – not instantly (remember, the cloud can’t do these thing that quickly, they still need to compute) but as you push up the resoution, you should see benefit. And as anyone that’s used a progressive rendered (like Modo, KeyShot et al) will appreciate, your resources locally aren’t eaten up.
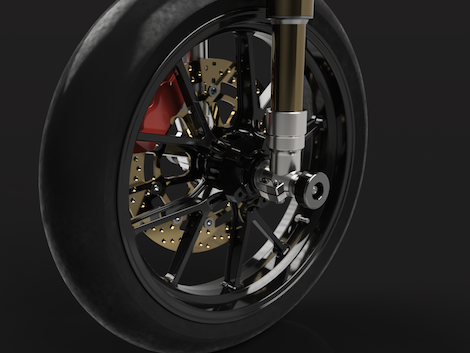
Results from Cloud render – we sent this out to calculate at 2100 x 1600 – it came back in 16 minutes, ready to rock.
It’s worth noting that from the render results window, there’s also a little turn table icon. This will re-render your whole model and give you back a turntable animation – you’ve the choice of 6 or 36 frames and the usual resolutions and aspect ratios. The video from the process is below, but it’ll also download as a HTML viewer for the same purposes.
Costs?
When it comes to credits and paying for this service, it’s pretty clear that you’re going to need to keep an eye on how much it’s costing you. You get 100 credits. If you want to buy more, it looks to be a simple case of 100 credits costs $100. So that render above cost $3. Yup. Autodesk just put a price on rendering. And when you consider the iterative nature of design, that could rack up very quickly. As an example, I calculated a turntable of the same model, to a decent resolution at 36 frames. That had a cost of $35 for the 26 frames required to calculate it.
Personally, I think that Autodesk needs to look at this if it wants to see take up. Rendering is something that everyone does – it’s not a process reserved for the few anymore. The tools it has are simple to use, and can get users some stunning results. The issue is usability and experience. Rendering is an iterative process – mistakes are made, design changes are made and it’s an enabler of experimentation. Of course, the local compute helps here – you can bash through the images quickly – but it’s a resource hog. And of course, you can’t output images greater than your screen resolution.
The cloud has the potential to help. You can use greater computation power and keep your local resources free for other tasks and jobs. But if you’ve got a dollar price against it, that’ll put people off. I understand that there’s a cost implication for cloud-solves to the vendors (those data centres don’t pay for themselves). But there’s a few options for Autodesk. It could open up the resolution output from the local computation to higher resolution images (perhaps reserving that for the paid customers or those using Ultimate). It could include cloud credits in your monthly subscription ( Fusion Ultimate could have more, perhaps).
Otherwise you know what will happen? Folks will just go and buy KeyShot. If you consider the highly iterative nature of getting a rendering project done, it’s not something that most users will be comfortable with having charged at a cost per mistake.
#3: Error handling
This is one of those smart ones – we’re all used to modelling systems not giving us the geometry we want. It’s often the case that the mathematics behind it can’t work – fillets is a solid example. What’s key is that the system gives you feedback about why the geometry you want can’t be built, so you can learn from it and fix it. Fusion’s March update brings online some of this type of feedback, particularly when you’re dealing with the likes of holes, chamfers, threads, shells and such.
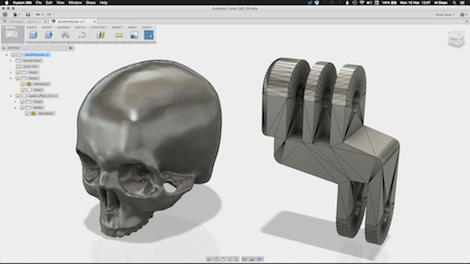
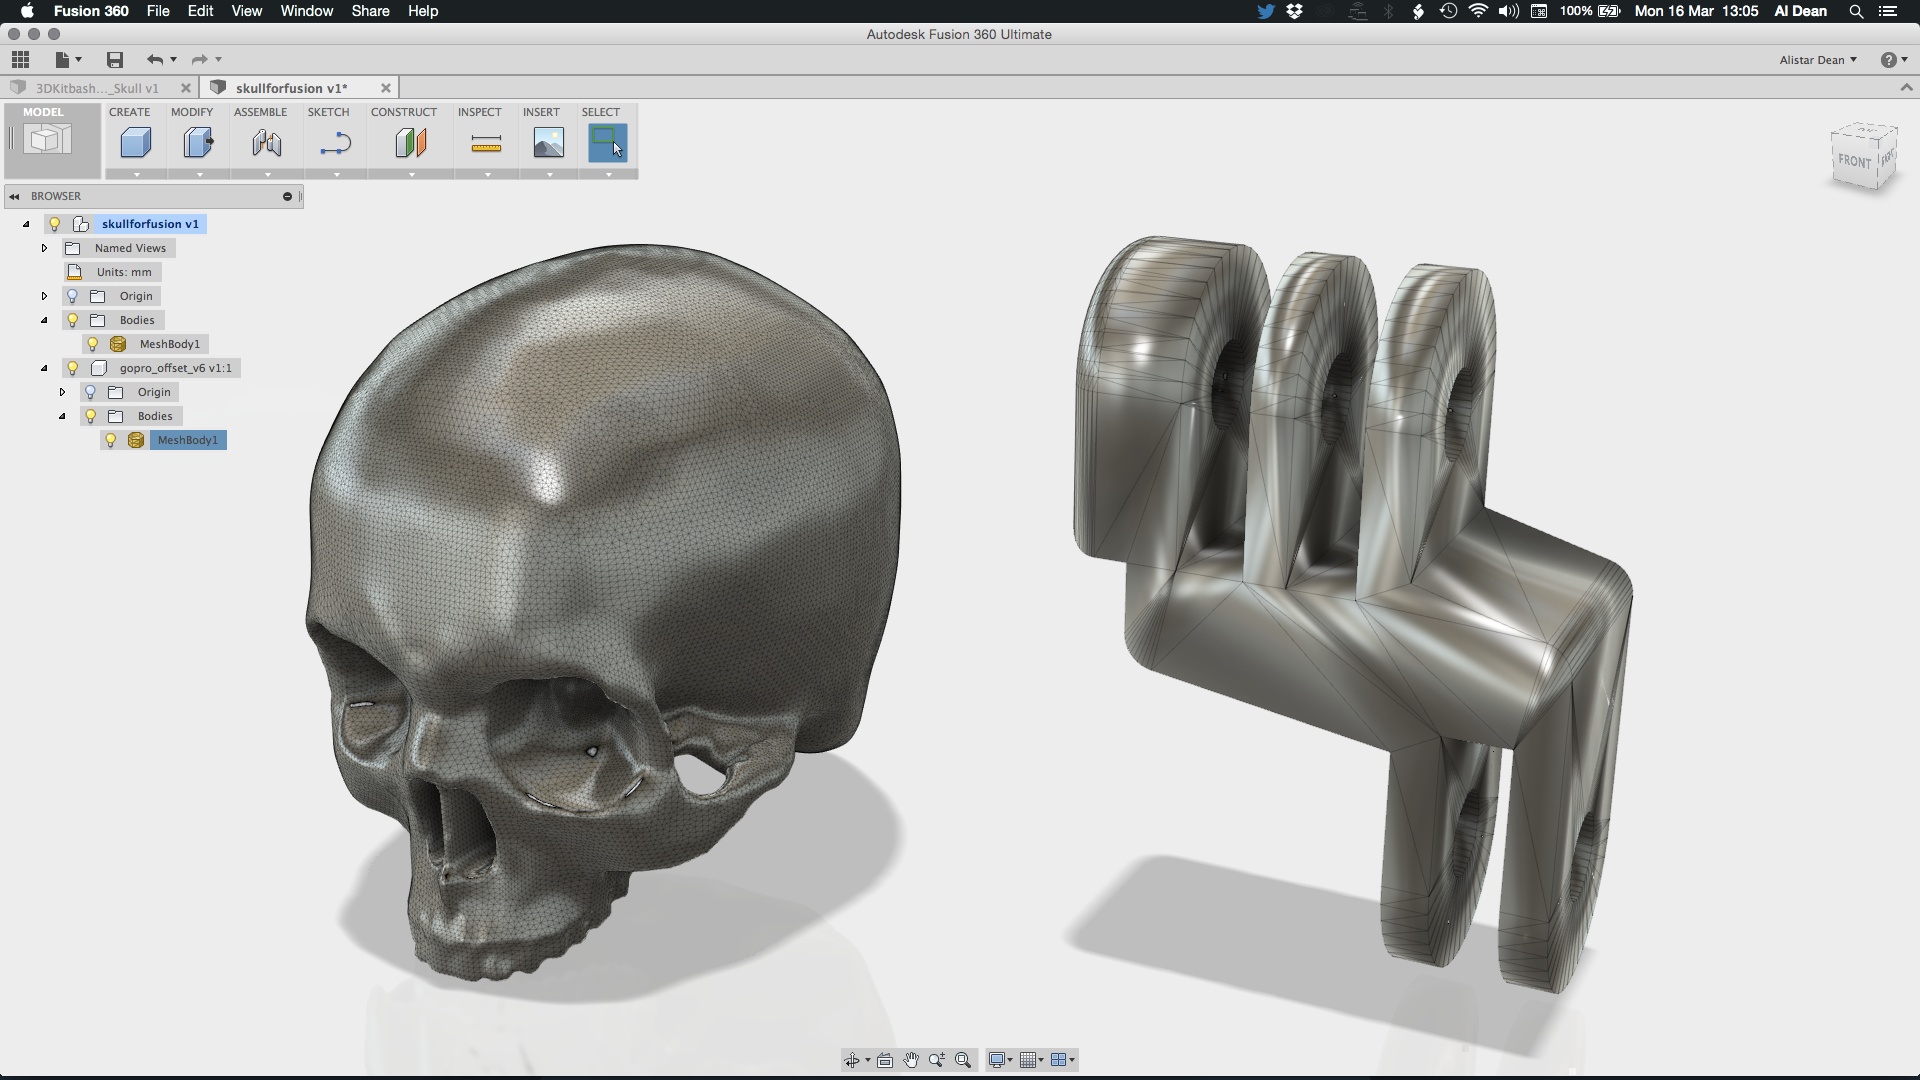
#4: Fixed the wonky mesh display mode
For me, this is a long-awaited one. If you’ve ever imported STL geometry into Fusion, you’ll see that it handles it nicely, has some capabilities to both convert that geometry into something useable and modifiable (such as snapping t splines to meshes), but there’s always been an issue with regards display.
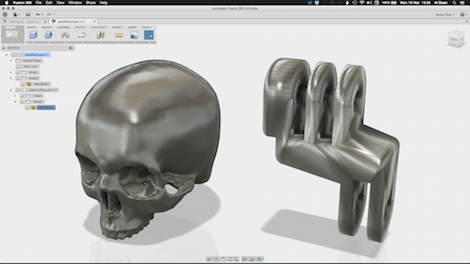
If you look at the two parts above, you’ll notice that the skull displays nicely while the more planar part doesn’t. The reason is that the display for meshes is based on calculating the curvature of the surface based on the surrounding faces – so for curved forms, it’s ideal. For planar, hard edged parts, not so much. This is now fixed with a Flat Shading option in the display options.
#5: Parts lists in Drawings
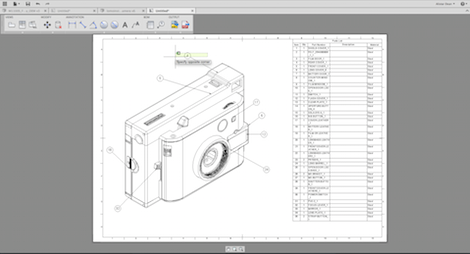
In case you missed it or haven’t had a chance to dig into Fusion in a while, there is now drawing capability in both the PC and Mac versions. These are still at the basic stage (sections are there – detail views are not) as yet, but they do now have parts list capabilities – that means you can create a Bill of Materials in your drawing sheets as well as add in the associated balloon annotations.
#6: CAM Updates
While all of the CAD modelling and rendering tools are nice, what’s got a lot of folks interested in Fusion 360 are the CAM tools. Whether they’re looking for a lower cost alternative to the 2.5 or 3 axis CAM they’ve already got in house or indeed, are bringing machining (whether at the production end of the spectrum or in the prototyping/workshop environment) in house for the first time). Compared to the cost of many other mainstream CAM systems, Fusion’s CAM tools are a bargain.
There’s been a number of key updates for this release. For those using the system already, the addition of personal libraries (which are transportable between different computers) is a biggie. This lets you keep your tools/cutter, posts and templates with you, rather than having to manual copy (or worst case) recreate them between each computer you ran Fusion on. Another (and a personal one on my wishlist) is the ability to measure the remaining stock between the simulated stock and the work piece when you’re running a simulation. There’s a whole bunch of other updates, but I’ll let you dig into them if you’re running it already.


