

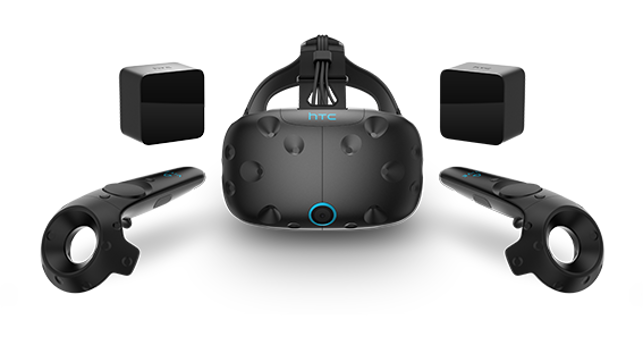
HTC Vive Business Edition, including base station trackers and controllers
The HTC Vive has become one of the most popular VR headsets for professional use. Why? Because it was the first to offer an impressive, affordable ‘room scale’ VR experience with intuitive hand controllers.
What this essentially means is that you can walk around your virtual object, inspect it from any angle — just as you would a physical model in the real world. But that freedom requires a fair bit of planning, so we’re going to run you through the set-up process and explain how to avoid some of the mistakes we’ve made in the last couple of months.
The HTC Vive comprises four main components: the headset (which includes the display and a built in cable, for power, data, and video), the link box (which acts as a junction box between the headset and the workstation), the hand controllers (which can be waved as wands or used as trackpads) and the tracking base stations.
Installation is relatively straightforward and the HTC Vive setup software guides the user through the process step by step. Detailed instructions can be found here.
The first thing you need to decide is how to set out your workspace. This depends on how you intend to use the Vive and / or the space you have available. The Vive can be configured in one of two ways; either at Room Scale or seated / standing use. Let’s explore those options and what they mean for product development.
Room scale set-up
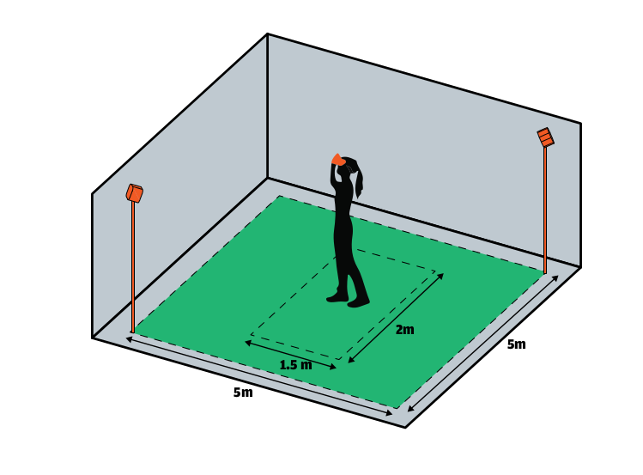
With the HTC Vive, ‘Room Scale’ means a working space of up to 5m x 5m. This is great for design review as the space is almost big enough to be able to walk right round a virtual car and inspect it from any angle. If you don’t have the luxury of this much space, it can be dialled back a little. The minimum working area is 1.5m x 2m.
For a room scale experience the position of the trackers is very important. They need to be placed at the opposite corners of your workspace, at a height of 2m of more, angled down 30-45 degrees with an unobstructed view of each other, and of the HTC Vive.
Both base stations plug into mains power and are not connected to the headset or your workstation.
Ideally, both base stations should be connected to each other using the sync cable but it’s not essential. When using the sync cable, press the mode button on the back of each base station until one shows ‘a’ and the other ‘b’. If the sync cable is not used then set to ‘b’ and ‘c’. Once they are in sync the built in lights should turn solid green.
Base stations can be wall mounted (mounts are supplied), but if you want to keep things portable (for ad hoc design review sessions), then use a pair of photographic lighting tripods with angled adapters so they can point down. However, make sure they are very stable — not only for the safety of your base stations but if they do wobble from vibrations you can get tracking issues.
Base stations can also suff er from light interference, which can also lead to tracking issues. It is advisable not to place them in direct sunlight and if you have mirrors or reflective screens in your room, you may need to cover these up.
The HTC Vive Business Edition comes with a 5m extension lead which means you can route the cable above head height and have it hanging down from the ceiling. This stops the cable becoming a trip hazard, which makes for a better VR experience and may be important for getting sign off from health and safety.
During set up, the software allows you to define your safe working area by tracing the outline of your workspace. It’s best to play a bit safe here, as it is very easy to lose yourself in the virtual world. You should certainly avoid potential obstacles such as window sills and airconditioning units up high. While the HTC Vive is sturdy, smashing your controllers, or worse still, your headset into solid objects is not advisable.
To help keep you and your technology safe ‘Chaperone’ mode notifies you when you get near to the outer edges of your workspace. It can also overlay ‘wireframe’ like representations of both objects and other people in your work area.
Seated/standing setup
A room scale set-up offers the best immersive experience, particularly for design review. However, those with more limited space or who simply want to use the Vive when sitting at a desk to enhance the design process, can also set up the system for a seated / standing experience.
You’ll still be able to move your head freely and use the controllers, but you’ll be limited in how much you can walk around your virtual models. In some applications, a mouse and keyboard can also be used to explore your VR models in this mode.
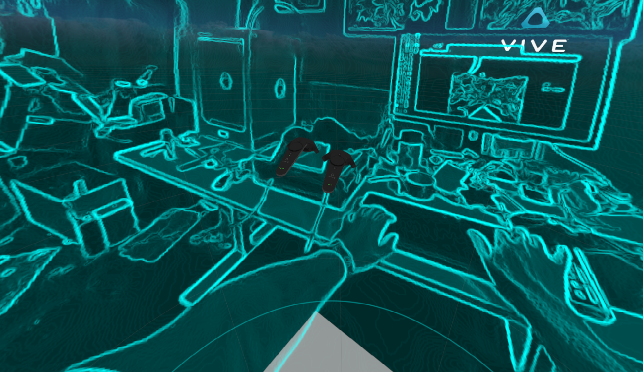
Chaperone mode with the front facing camera is essential for a more crowded workspace, particularly with multiple participants
Configuration
The HTC Vive headset features a long chunky cable that connects to a dedicated link box. The link box then connects to power, and to your workstation via USB and a video cable (HDMi if you have a gaming GPU or DisplayPort to mini DisplayPort or DisplayPort to HDMi if you have a professional GPU).
It is very important to use quality branded cables or adapters to run between your GPU and the link box (we recommend StarTech, but we have also heard positive things about Club3D and Accell). Cheap cables and adapters can cause all sorts of problems.
Installation is very easy. Simply go vive.com/setup, download the software and follow the on screen instructions.
When first starting the machine after setup, a good tip is to unplug the Vive from your workstation’s GPU as Windows may boot to the Vive’s display, rather than to your monitor and you won’t see your Windows desktop.
Other teething problems can arise from USB port incompatibilities. HTC has documented that some USB 3.0 and 3.1 chipsets can cause tracking issues. We have even heard of problems with major branded workstations.
If you do have an issue, HTC’s advice here is to try plugging your Link Box into a USB 2.0 port. Alternatively buy a recommended USB PCIe add-in card.
Getting working
Once the set-up process is complete, you’re ready to get into your VR sessions and explore the potential.
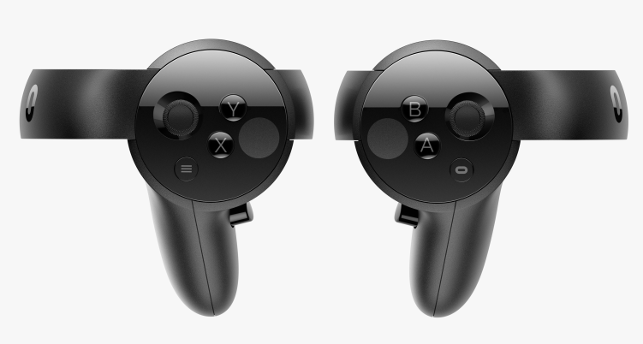
Control varies between applications, with different uses for the trigger, trackpad and grip buttons. Some applications give a guided tour of the controls, but others don’t so you’ll need to read up on each to make sure you get the most out of them.
One thing that is common in many pro VR applications is the teleport function, which allows you to travel a longer distance than a few steps. Other applications have real time sectioning, measurements and markup. However, we are only starting to scratch the surface of what is possible.
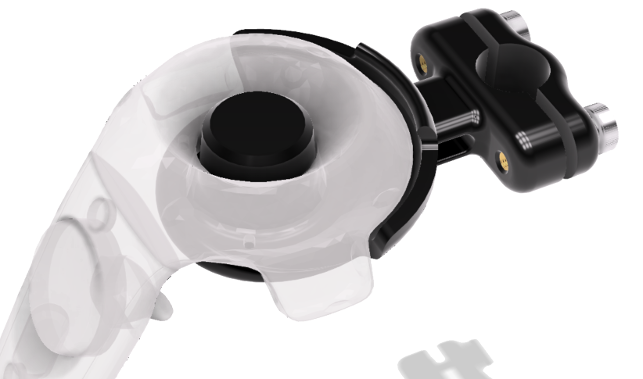
Keep things tidy: 3D print the DEVELOP3D VR mounts
In between VR sessions, we often found ourselves looking for a suitable place to store and charge the HTC Vive controllers.
So we decided to design some mounts to keep them out of harm’s way. The design we came up with was a mount that could be easily attached to a photographic lighting tripod.
After a day or two’s work, including sourcing an accurate model of the controller (found in the set-up files of the Vive, as an OBJ file), we modelled up a dock in 3D CAD. The design holds the devices, retains the charging cables and can be attached to the lighting tripods. The parts were 3D printed overnight on the Markforged Mark Two.
Now, when we’ve finished our VR sessions, we can pop each controller into place and will always know where they are, without having to scrabble around on the floor to find them.
Free download
If you want to dive in and manufacture your own Vive controller mounts, we’ve uploaded the 3D printable files and details on what other parts you need to GrabCAD — get the STL and STEP files here:

Oculus Rift: The alternative to the HTC Vive
The HTC Vive may have set the pace in professional VR for product development, but the Oculus Rift is now starting to catch up.
When it was first launched in Spring 2016, the Rift started out by only offering a seated / standing experience, where the user could only move small distances and navigation was performed with a gamepad or mouse.
This type of experience still comes with the base package, but the Facebook owned VR headset now offers two optional hand-tracking Touch controllers and additional VR tracking sensors for a full room-scale experience.
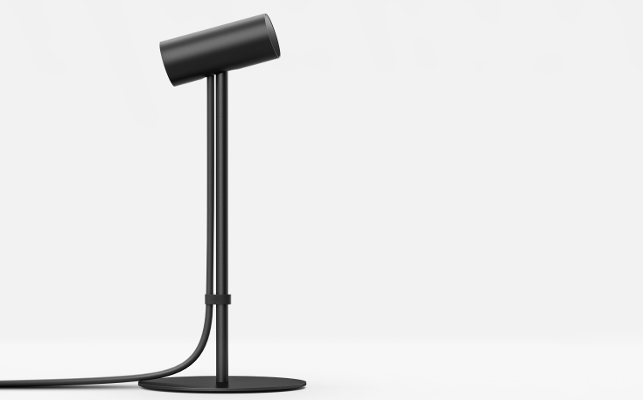
A total of three sensors are recommended. One comes with the standard headset, another with the Touch controllers and a third can be bought separately.
Of course the Rift can still be used for a seated / standing experience, which is perfectly fine when all you want to do is jump in and out of VR to aid the product development process. In this mode, setup is very easy. Simply download the installation software, place the sensor on your desk, then plug in the USB cables.
The headset features a built in HDMi cable so, if you’re using a professional Quadro or Radeon Pro GPU, you’ll need to buy a quality HDMi to DisplayPort adapter.
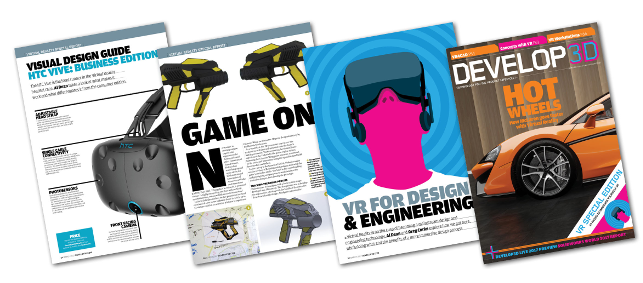
This article is part of a DEVELOP3D Special Report into Virtual Reality (VR) for design, engineering and manufacturing, which takes an in-depth look at the latest developments in software and hardware and what you need to get up and running.
Everything is for a reason How McLaren Automotive unleashes VR to create faster cars with more attention to detail
Quick guide: VR enabled applications A list of what’s out there now or coming soon
Virtual Reality challenges & future Six industry thought leader’s views on the future of VR
Workstations & GPUs for VR A back to basics guide to buying hardware for Virtual Reality
The future of immersive engineering Virtual Reality (VR) is the current hot topic, but Augmented Reality (AR) and Mixed Reality (MR) is on its way. We take a look at where things are heading
Game on Amalgam creates game controllers for Holovis
VRED Pro 2017 & VR The latest release adds greater support for the HTC Vive and Oculus Rift tools
Virtalis VR4CAD Offering expertise in VR at a much more affordable level
ESI Group IC.IDO 11 ESI’s IC.ID0 is one of the most advanced Digital Mock Up tools available. With its addition of Vive support, we take a look at what the system is capable of and how it can benefit engineering
Gravity Sketch Beta An interesting take on Modelling in Virtual Reality
Google Tiltbrush A system for VR creativity that’s both cheap and capable
Oculus Medium A good contender for design experimentation
Amari Magnetar V25 This stylish workstation has been specifically designed for VR. But despite its slimsline chassis, you can still cram in incredible processing power
Nvidia Quadro P2000/P4000 Nvidia is changing the landscape of professional 3D graphics with a new family of Pascal Quadro GPUs, including a single slot ‘VR Ready’ card.
To read all the articles, as they appeared in DEVELOP3D Magazine, you can download the March Edition here.
Shopping list
High quality display cables: If you’re running a pro graphics workstation, you’ll need a good quality DisplayPort to HDMi cable or a Mini DisplayPort to DisplayPort cable. Cheap cables and cheap adapters can cause you days of grief till you work out that’s what’s causing your problem. StarTech is our favoured brand.
Flash stands : While the system is supplied with a set of wall mounts, you might not want use them or your landlord might not be too keen on you drilling holes in the offi ce walls. Light stands are a good choice. Raise them to the required 2m+ height. These are also essential if you want a set-up that’s either portable or can be quickly packed away when not in use.
Tripod Ball heads: While the light stands are perfect for height, they typically don’t give you the angle you need for the tracking base stations to function properly. Buy yourself a couple of angle heads.
10m USB cable with repeater: As the Vive is early stage hardware, the updates are frequent. Updating firmware on the headset and controllers is easy — the tracking heads, less so. Buy a USB extender cable (with a repeater unit) that’ll reach from your workstation to your trackers so you can update them without having to dismount.
Extra long microUSB charging cables: HTC is a bit skimpy with the length of the USB charging cables for the controllers. We’d suggest buying a good 6 or 10m cables — Anker does some nice sturdy, braided ones that’ll last.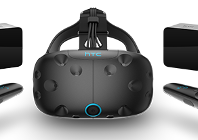
Our experience of working with HTC Vive and how to avoid common mistakes
Default


