When it comes to using 3D printing to build plastic prototype parts, while there are a multitude of benefits, there are also issues compared to using injection moulding.
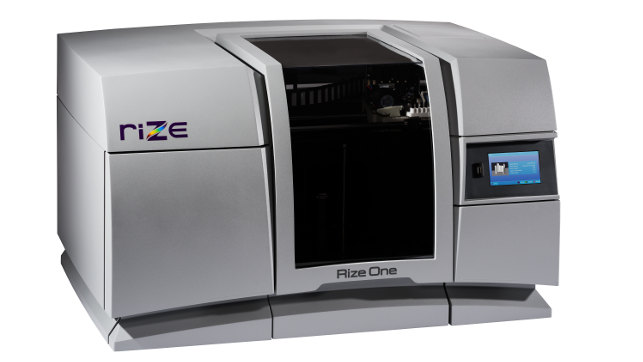
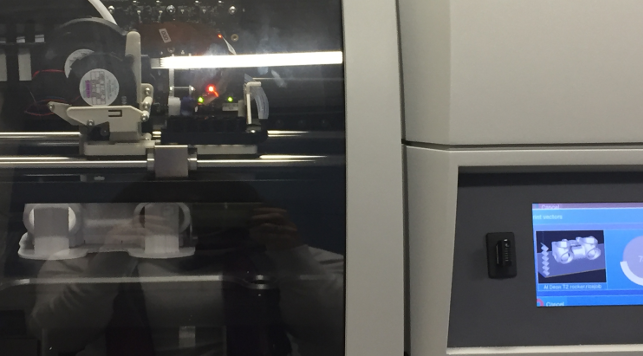
The Rize One — benchtop and perfectly suited for use in an office due to zero emissions and ‘clean’ support structure
One of the first is the pain of removing the supports from parts when they come out of the 3D printer. While there are a range of machines and methods that help deal with this issue, when it comes to single build material machines, this is generally still time consuming.
Given that supports are commonly built using the same material feed stock as the part, removal at the connection point between the support and the part’s form can be tricky and could even impact surface quality.
The second common issue is down to the build method used in filament-based machines. The process requires that parts are built up using a layer-based approach.
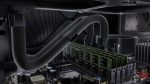
This results in weaknesses in the axis of the build — the Z-axis.
The material is fused together at a near melting temperature, rather than being in liquid form as per injection moulding. This means that there’s an inherent weakness in the part along that direction.
Add to these two factors the issue that these parts and materials themselves, in most instances, have a very short life span. With a prototype part you build it, you check it against your requirements, perhaps have a design review and then you usually dispose of it. This, of course, creates a lot of waste.
Not only in the support structures (which are binned immediately), but also the parts that aren’t required once the next revision comes along. As a result, almost everything is eventually scrapped.
While it’s impossible to avoid building prototype parts, the concern for many is the environmental impact of those parts. Not only the materials themselves, but your ability to recycle them.
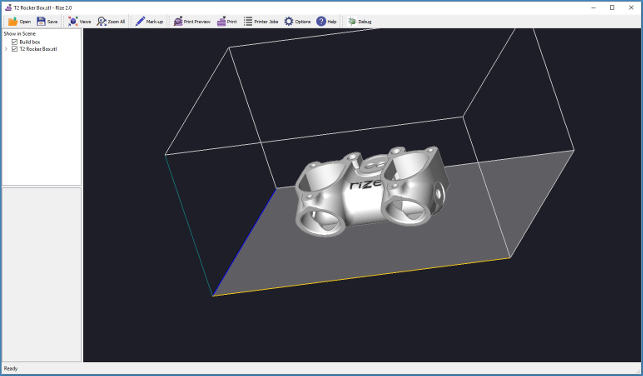
Rize’s set up software showing our test part during pre-processing
Enter the Rize One
Given these challenges, it’s interesting to see a 3D printer manufacturer come to market looking to solve all of these issues in a single machine.
This has been Rize’s driving guidance since the company was founded in late 2016 by a team comprised of folks from 3D printing heavyweights such as Objet, Z Corporation and Stratasys.
Its intent is to create a process and machine that not only improves the mechanical strength of parts in the Z direction, but one that also looks to address post processing and end-of-life treatment of the parts that are built.
So shall we take a look at what its first machine, the Rize One, is capable of and how the parts produced stand up to the company’s aims?
One of our test parts with the support structure intent. The majority of these snap off with little effort. The internal supports, however, do require a little more effort to remove
The machine
Although billed as an office machine, the Rize One is a beast that’ll require its own workbench and a fair bit of space.
Weighing in at over 60kg, this isn’t a desktop FDM and is more in line with higher-end 3D printers, such as the likes of Stratasys’ Fortus machines.
In terms of build process, it features a heated chamber of 300 x 200 x 150mm, is network connected and gives off zero harmful emissions during build. That, combined with the post processing, means that it’s perfectly suited for a true office environment.
Once you have it installed, it’s a case of slotting in the materials (there are three) and setting the build platform, before loading up your first print.
Rize’s set up software is pretty standard: it only runs on Windows but can be shared around the office for print queue management and remote pre-processing.
There’s network connectivity but, as yet, no wireless connectivity. You can, as you’d expect, also take your parts to the machine and load them via a USB key.
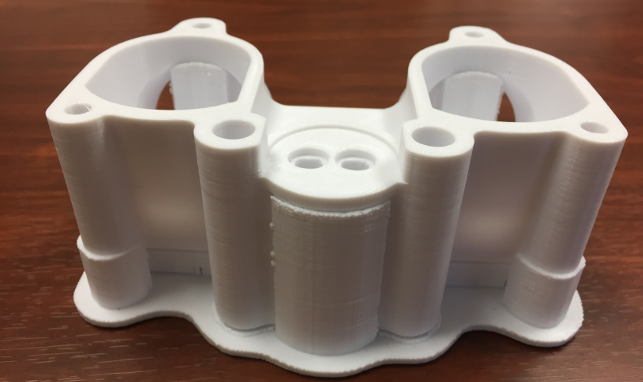
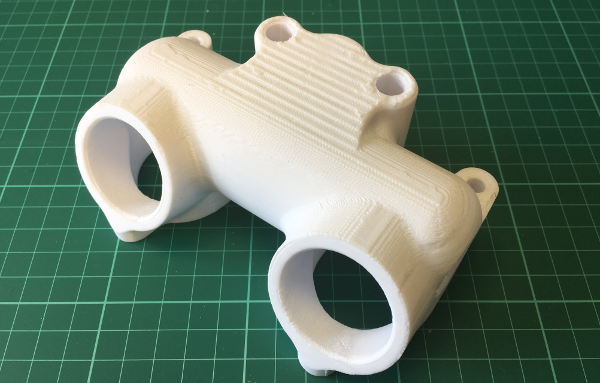
Our rocker box test part with supports intact. As you can see, external features are supported well and those supports removed quickly
The build process
On initial inspection, the Rize machine’s build process is pretty standard for a filament machine — it builds up each part’s form using an extrusion head, layer by layer, until complete — but there’s more to it than that.
Most FDM machines slice each part into a layer. That layer is made up of movement of the extruder to create the outer boundary, then filled in to a specified percentage — commonly referred to as the ‘in-fill’ value.
The more of this internal structure there is, the stronger the part, with the exception of the Z-axis, where the bond between each layer isn’t as strong.
The Rize process, referred to as Augmented Polymer Deposition, differs from the standard FDM method through its ability to add in a layer of ‘ink’ (via a print head) between each layer put down by the standard extruder mechanism.
This serves two functions at present. The first is that it can add a layer of ‘release ink’ where needed, between the support structure and the part. This makes the supports easier to remove and, while it’s not a release agent per se, the deposited substance changes the properties of the thermoplastic. In this instance, weakening the bond between the part and the supports.
In addition to this ‘release ink’, Rize is also experimenting with other applications, including the second function, coloured ink, which is also shipping with the release machine.
This ability is ideal for adding graphics to a part, including useful things such as part serial numbers and basic decals/logos.
While only available in blue at present, the intent is to expand it to support full CMYK printing in the future, as well as an intriguing use of electro conductive inks for internal circuitry.
These extra abilities come at a cost.
The Rise One is priced at $26,000, which includes a three month warranty but this can be extended to a year for an extra two grand. The colour ink is an optional $3,000. Out of the box, the machine is supplied with a spool of material, two build plates, and a cartridge of the part release ink. There’s also an ink waste cartridge and a set of support removal tools as well.
In terms of consumables, materials is the biggest outlay, coming in at $119 for 840 grams. The release ink consumable is $199, and the same for the colour ink.
Replacement build plates should last six months and will cost $50 to replace.
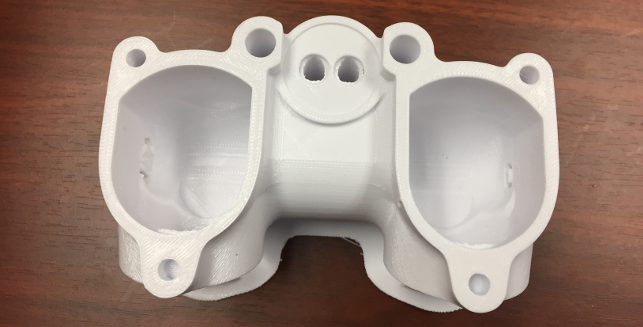
The internal supports proved much more of a challenge to remove, but the surface finish was excellent, particularly compared to other ‘single build material’ machines
In conclusion
The Rize One builds tough parts — really tough parts. The Rizium material is a Cycloolefin Polymer (COP) and analogous to a polycarbonate.
I do love the fact that the material and process are much cleaner than most. If you’re looking for a true office-based machine, then this is a good option. There are no noxious chemicals or heavy post processing — it’s simply down to you, a set of hand tools and a bit of time.
The layer thickness is fixed, so if you’re OK with .025 mm layers and the inherent surface finish, then you’re golden.
Here, there’s always going to be a trade-off — tough parts or finer details.
The tough parts the machine produces certainly stand up to Rize’s claim of being more akin to injection moulded parts and you certainly get better strength in that all important Z-axis. However, if you’re looking for a smoother surface finish, this isn’t the highest quality you’ll find from filament focussed machines. Think of it more as a combination of SLS-strength nylon with the resolution of the lower-end of FDM.
It’s this combination of toughness and a good quality part where the machine excels against the list of challenges that the company was founded to solve.
It’ll be ideal for those looking to prototype more functional parts and for additively manufactured jigs, fixtures and the likes. But if it’s presentation models you’re after, there are better and cheaper options out there.
There’s also the ability to build (or rather print in) ink into the system. This will be useful for those looking for more traceability in their production processes.
It’s not at the resolution (and currently, lacks full colour options) that you’ll be able to add huge details into it, but it’ll be useful for some.
The other aspect to consider is the material and build process itself. The material is a medical grade thermoplastic and the whole process is done in a clean environment. This, along with the combination of watertight parts, means that these are ideal for use in certain situations in the medical field (as they can be sterilised).
With respect to the company’s claims of there being zero post processing (which has recently been adjusted to “near zero”), I’m going to have to disagree.
For test cases and parts that don’t have internal support requirements, yes, support removal is very quick indeed. Yet the reality is that there are many instances where you need a part that requires internal supports and these, despite Rize’s claims, still require effort and planning. The technology does a good job of making them easier to remove, but there’s still a fair bit of effort required. As a result, even claiming “near zero” post processing is a bit misleading.
Our rocker box test part is evidence of this and it’s the reason why we use it for such tests. Rize’s machine built an excellent, strong part but there was still considerable effort required to remove the all important internal supports.
Yes, it’s quicker than many and there’s no soaking in tubs to remove supports, but there is still manual effort involved.
For its first release, Rize has moved closer to tackling the key issues that blight the single material FDM process, with its quick release supports on the whole being slick and pretty easy (geometry dependent, of course). With further materials and functions promised, it makes it a very interesting machine.
Ultimately, the Rize One builds quickly, offers tough parts in a clean environment and, if those properties match your own requirements, then it’s a solid machine.
Yet, for the size of build envelope offered, it’s a costly option — particularly in comparison with what else is available at the bench-top or studio level, and its currently limited set of material options.
 Enjoying this? Read our other Pro Desktop 3D Printer reviews here:
- Formlabs Form 3
- MakerBot Method X
- Raise3D E2
- 3D Systems FabPro 1000
- Ultimaker S5
- Stratasys F123 Series
- Rize Inc. Rize One
Tech-specs
» Rize One
» Proprietary thermoplastic filament, release agent and marking ink
» 300 x 200 x 150mm build volume
» 543 x 915 x 644mm machine dimensions
» 61 kg weight
» 0.25mm layers
» Filament spools, ink cartridges, build plate
» USB key and ethernet connectivity
» 3 month warranty (extendable)
» Price From $26,000
Large & bulky part
Test part: Rockerbox Cover
Challenge: This is a chunky part with complex features that need to be replicated on all sides. Internal features also test support removal. This was even more key when evaluating Rize’s process.
Material usage :0.083 Kg Rizium One thermoplastic
Build time:14 hours (@ 0.25mm layers)
Cost: $23.22
Results: All of the features replicated well although the resolution of the machine meant that some post finishing would be needed, particularly on vertical side wall features. The internal supports proved a challenge to remove, but once you realise that the key is to break up the supports to remove them, it’s pretty painless.
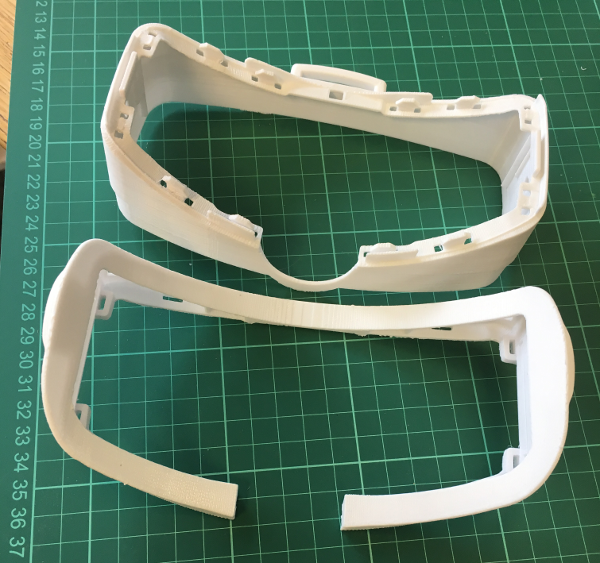
Thin walls & details
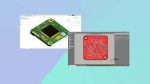
Test part: Oculus Internal Components from DK1 dataset
Challenge: This is a matching set of components that have thin walls, more complex internal structures and some tricky details.
Material usage:0.061 Kg + 0.098 Kg Rizium One thermoplastic
Build time:9 hours 8 minutes + 11.5 hours (@ 0.25mm layers)
Cost: $8.74 + $14.00 = $22.74
Results: These are particularly complex components, both in terms of their geometry (thinner wall sections, internal geometries) and their function (in terms of snap fits and associated features). The results came out well, but the resolution of the Rize One meant that the smaller features didn’t replicate well. That said, they performed their function which wouldn’t happen with many thermoplastic based build processes.