Stuart Brown of 3DEngineers looks at best practices when laser scanning your first project
With modern equipment and the present cost of scanning, it is still surprising that there is a tendency to let the equipment take the strain and just set up and get going with the work in hand without having any strategy in place for checking that a scan is conducted with efficiency, within the equipment’s prescribed limits and any kind of thinking as to what the scan is going to be used for.
Preparing to undertake a scan should involve firstly educating your client as to what you require and the impact of scanning on his firm’s working day. There is a common misconception that scanning essentially involves waiving a scanner vaguely at the subject, pressing a button and hey presto a perfect scan arrives on the laptop. I always start by explaining the basic requirements being space, power, temperature, light, preparation of the subject and dealing with interested but distracting third parties.
Dealing with these in order:
Space
Ideally, you will need a minimum of one metre all around the subject and if using a traditional white light scanner on a large subject, possibly up to several metres or the opportunity to reposition the subject as the scan progresses.
Power
Are the power points easily accessible and available for use on the day? Are they in good condition with no known faults? Are you sharing “electrical space” with items of equipment that may affect the computer and scanner? In this regard, welding equipment springs to mind.
Temperature
An often overlooked, but critical factor. Most scanners will get kooky as the temperature reaches their prescribed limits, typically manifesting itself in the form of repeated crashes and acquiring data taking longer than normal. We had a case this winter when a Creaform scanner refused to work at all until the temperature had been raised. Not the scanner’s fault, but ours for attempting a scan in sub-normal conditions. Other problems that temperature can cause are misting up of the optics sometimes in an unknown area as it occurs internally and in varying temperature conditions variance in data.
As part of our standard equipment we carry a thermometer. Additionally we now insist on the temperature being raised and kept as constant as is possible and most importantly, we allow the scanner to acclimatise to its surroundings for a minimum of 15 minutes, but preferably for half an hour. This allows all the internals to equalise temperature wise. In fact, Creaform scanners have this written into the operating instructions.
Light
Adjustment of light is often critical to obtaining a good quality scan. Most people know this. However, if you request lights off in a workshop of ten people you will not be popular. Broach the subject at point of sale and not on the day of the scan.
Subject preparation
Be aware of the limitations of your equipment in relation to what you are scanning. Can your scanner even achieve scanning the subject? At 3D Engineers, we have access to four scanners both white light and laser as every scanning system has its own strengths and weaknesses. For example, the Creaform Handyscan is great when a large object needs to be scanned and cannot be matted with spray. However, for a small subject we may well use the Next Engine with rotating base attachment (thanks Al!).
Spotters
Lastly, we come to the important subject of dealing with people wasting time as scanning is still a novelty and with the best intentions take up your time with numerous questions. As part of our sales process, we always re-iterate that time is money and time spent talking is being charged out at X per hour! Usually, we manage to get the questions out of the way whilst the scanning system is acclimatising.
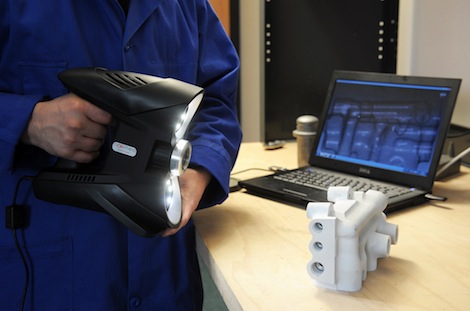
Once on site, we break open the scanner to start the acclimatisation process and assess the subject and environment to ensure that what we have told fits what we are now seeing. Being organised, our kit (picture will be supplied) is neatly arranged, checklist bought out and disclaimers if required filled in and signed.
Did we say disclaimers? Do you want to be responsible for the health and safety of your client’s employees or damage to the subject? Have you assessed the subject and filled in a condition form? None of this is important until something does go wrong – and it will – and solicitors get involved. As an added precaution, we always record a video of the site and subject as it is found and additionally when we leave to avoid any potential future problems. A form is signed on completion of the contract confirming we have left everything in the condition we found it.
Forms completed and scanner acclimatising, we get on with preparing the site and subject. We always ensure that the area we are working in is completely devoid of any equipment, wires and detritus bar the scanning equipment and its leads. Health and Safety good practice.
Next, a scanning strategy is worked out. Are areas bounded or containing problem surfaces such as chrome or glass? If so, we always have some masking tape, paper and “dust” to hand to mask of the offending areas. It is sheer laziness to scan over them knowing the area “won’t take”. This often leads to scanner craziness with outliers all over the place and can even confuse and crash the scanner. It almost certainly will produce erroneous data and increase post processing time. Does the subject contain areas of different texture or colour? If so, again they will need to be matted down with a matte white spray or with systems such as Creaform, you should recalibrate the scanner for each eventuality.
With regard to matting down spray we have seen a variety of substances used from self mixed concoctions of methylated spirit and talc to foot spray. We use none of the above but rather go for Ambersil Flaw Detector Developer 3 as it comes with a data sheet confirming what it will and will not do. The cost is small, so why bother with products of unknown effect or created for a completely different application?
On large objects, we introduce artificial features to help the scans lock on and occasionally use black pinstripes to divide an object up into handy areas.
With everything prepared, it is time to start scanning. Well almost. As part of our workflow, we fire up Geomagic in preparation for introducing scans as they are created.
Why so? Because, it enables the progress of a scan to be assessed on the fly and we save the Geomagic .wrp onto a separate disc so we are creating a backup should a catastrophy occur at point of scan. Regarding the progress point, this is really critical as it is so easy to lose yourself when scanning and get to the end of the day – or even worse – back at the office with an incomplete scan, or a scan that cannot be knit into a complete subject as there is not enough overlap or unique features to lock onto. This happened on a scan we recently received from a third party where a critical area of a Ferrari had not been scanned and on enquiring about the car’s whereabouts, we were told it was in a shipping container on the way to Malaysia. I am an optimistic person, but certainly from a scanning point of view that is a truly unsolvable problem.
Once you have methodically obtained all the scans you require and proven to yourself that the data acquired has knitted together in Geomagic it is time to complete the scanning contract.
To this end, we always:
- Show the client the scan data in Geomagic to ensure that at least visually it meets his needs.
- Tidy up the work area. If using a scanning system like Creaform or ZCorp look, look and look again for missed positioning dots. If working on military equipment, it may even be a requirement to count them all on and off. Again using a recent example, a client was less than pleased when we noticed that his Lamborghini – that had only been to us and his servicing garage – was found to have positioning dots left we assumed by a previous less than diligent scanning firm that had taken an unauthorised scan for persons unknown. Although this was amusing, leaving your mark with dots or white powder (!!!??) is not the height of professionalism. Aim to leave your subject as you found it.
- Video the finished work area and subject.
- Obtain a disclaimer verifying that no damage has occurred to the subject or work environment.
Abide by the above procedure and you will avoid law of sod, the law and have covered every eventuality in an ordered and professional way and most importantly obtained a good scan.
Biography:
Stuart Brown is the main man at 3D Engineers (as featured in DEVELOP3D) and is now the UK distributor for the Noomeo Scanner. His favourite quote from a scanning job was having his ear bent by a spotter (slang: generally a time waster interested in a laser based device). Upon trying to change the subject by inquiring, “What do you think of your boss?“, said spotter replied “He is like a James Bond villain but instead of having an underground lair, he has the crap office in the corner.” then pointed.
Stuart Brown of 3DEngineers looks at best practices when laser scanning your first project
No