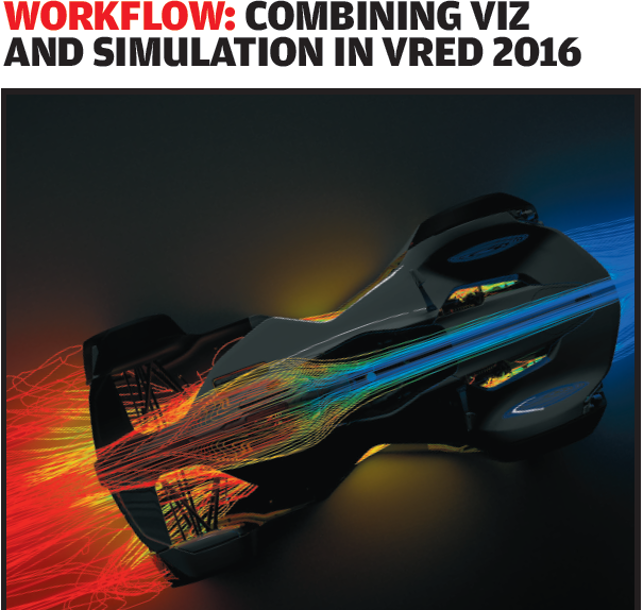
It has been an age since we first took a look at VRED. The last time we caught up with its developers, five years ago, the system was in beta and was just starting to create a buzz in the photorealistic design visualisation industry.

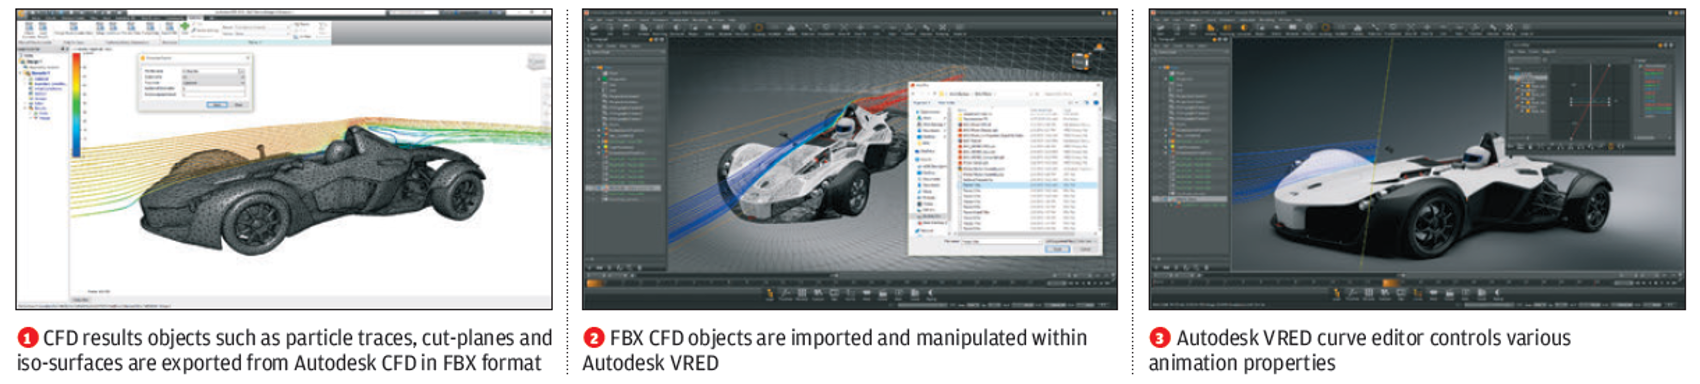
Autodesk’s VRED combines real-time ray tracing with pre-calculated realism for design review
Fast-forward to today, and the company has since been acquired by Autodesk and started to gain ground, particularly in the automotive industry.
For those who haven’t come across VRED before, it follows a workflow typical to almost every 3D rendering system out there, but with some added features that aren’t so widely available.
VRED is interesting, because it manages to combine the ease of use seen in progressive rendering systems such as KeyShot, with the greater control that you’ll see in a system like 3ds Max, Maya or Modo.
So let’s start by exploring the basic workflow and then delve into some of the more specialist and less common capabilities that VRED has to offer.
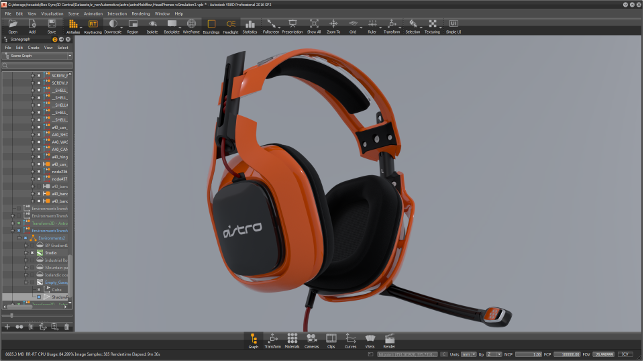
VRED – User experience
The system’s UI is available in two modes: these are the complex mode, with all the bells, whistles, dials and tweaks that some users want; and the simple mode, which removes the clutter and focuses on the key stages of the workflow.
Personally, I found myself switching between the two. In terms of what to expect, you’ve got a large model/scene viewing window, with strips of commands around the periphery of the screen and a couple of panels that pop up when you need them. Much of the system is driven from the command icons, pulldowns and the SceneGraph.
It’s the SceneGraph that really drives the system. You’re presented with a hierarchical list of the elements that make up your scene, from models and other geometric assets to environments.
VRED – Basic set-up workflow
You start with your base 3D geometry, imported from your 3D design system.
VRED is supplied with a pretty wide range of 3D data import formats. These include the usual suspects of STEP and IGES, along with visualisation formats such as OBJ, but the system also offers some direct connections to the likes of Alias and Pro/Engineer (now known as PTC Creo Parametric).
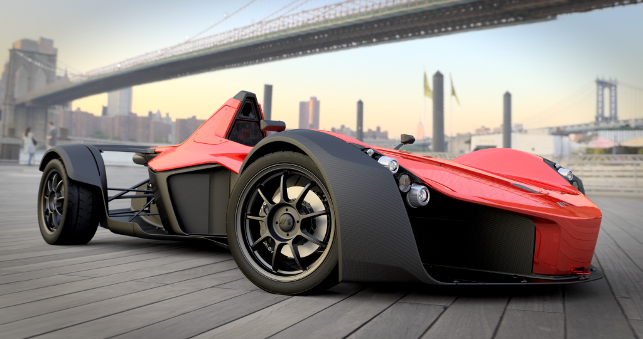
VRED offers both real-time, progressive rendering as well as pre-baked rendering tools, so it’s ideal for both design review as well as production of high-quality imagery
Even at this point, it’s clear that VRED is built for dealing with some of the most complex geometry out there. At the import stage, you have a number of options for tessellation as you import the geometry.
This can be done with global-level across the whole model, or, as is common with more complex data, by dialling down the resolution of non-critical components, but keeping it high for critical surfaces. This enables you to balance your model size and ensure that resources are dedicated to the key components you want to really show off.
Once your model is in place, you’re probably going to start applying materials. VRED doesn’t pull material designations from your geometry at all, so you’re looking at doing everything from scratch, but it’s supplied with a pretty comprehensive set of starter materials that give you a good base to start from.
There’s the usual array of metals, plastics, woods and composites, as well as some rather impressive measured materials.
These can be dragged and dropped onto the model, applied to selections from the SceneGraph (which itself can be filtered and searched by name, which proves very handy in some instances).
I’ve always followed the practice of starting to assign materials in a product model by selecting parts with common materials, assigning them and then hiding them. VRED’s keyboard shortcuts make quick work of this workflow.
VRED – Environment & lighting
The next step is to start to define the lighting and scene conditions for your model.
Most folks who have done any form of rendering with a modern system in the last year or two will be well aware of the benefits of using a HDR image as the lighting source.
The files that you need are widely available online and most of us are comfortable using them. It’s a very quick and accurate way to define lighting in a scene.
VRED includes support for the main formats (.HDR and .EXR) and lets you work with the various types of environment-mapping methods (such as a sphere, teardrop and so on).
As a default, the system gives you an environment, but you have control over the scale and size of this, which is key to getting your reflections bang on.
If you’re looking to use a combination of HDR image environment and back plate, this is supported as well (though there’s not any sign of perspective matching as yet).
Of course, while HDR images give you a means of very quickly setting up a scene, what you get is a global lighting set-up. If you’re working in consumer product design or automotive, the chances are that components within your scene also emit light, from LED sources in controls and touch panels, from light pipes and tubes, or from headlamps and the like.
VRED allows you to define emissive materials with some pre-sets. Its developers also recently introduced support for the Rayfile format. This is an interesting move for users looking to nail their renders and match specific products.
The Rayfile format captures light in a completely different way, allowing you to render captured sources more accurately.
If you’ve used IES descriptions of light sources before, it’s like that, but on steroids. The files from most manufacturers are huge (between 250MB and just short of 1GB), so you wouldn’t use them for everything, but when you’re looking to get as close to the physical reality, it’s great.
Ambient occulusion
Alongside materials/textures and lighting, this is perhaps one of the most fundamental parts of the workflow.
VRED does include a real-time ray tracing engine, but it also features a set of tools where you can ‘bake in’ materials and shadows, so that they’re consistently displayed without the need for heavy calculation every time you change the view.
To accomplish this, the system needs to calculate ambient occlusion for the model. This defines where light hits the model and where shadows are cast.
To enlarge image click here
VRED doesn’t automatically do this for you. Instead, you need to define the quality you want and identify the geometry to which you want it applied.
There’s a good reason for this. If you’re setting up VRED for design review, it allows you to dial up the quality on key aspects, dial it back on less important parts and get your display just so.
There are presets for different types of product – but be warned: if you go for high quality, you may find yourself waiting for a good amount of time with a complex scene, depending of course on your processing hardware.
But once the calculation is completed, the effect on the model, the materials you’ve applied and the lighting conditions you’ve set up really do come into their own.
VRED – Animation
Alongside the static image rendering tools you’d expect, VRED also has another couple of aces up its sleeve.
One is that the system includes a pretty easy-to-use set of animation tools, whether you’re looking to animate the camera (for turntable-like sequences) or animate individual components (for instance, a car’s doors opening).
These work in a keyframe manner that will be familiar to many, requiring a starting point, an end point and a time frame. The system handles the rest.
What’s also interesting, particularly for those working on products in motion, is that you can quickly assign motion blur to a set of components, to add that extra level of realism, without having to do it after the fact in Photoshop (a capability that’s obviously motivated by VRED’s uptake in the automotive industry).
VRED – Variants & design review
Perhaps one of VRED’s most interesting capabilities is its support for conducting design reviews, particularly when you’re looking to formalise configuration and colourways for a new product.
In part, this is down to its efficiency when you’re working in pre-calculated mode, where your materials, shadows and lighting are pre-baked into the scene.
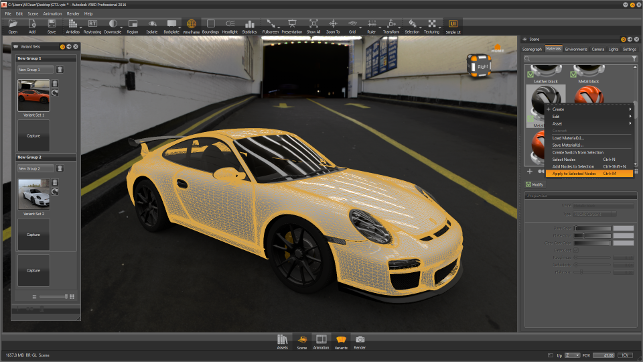
Variants and design options are easy to set-up, with animations
In part, it’s also been driven by its Variants capabilities, which allow you to define different set-ups, material designations and even swap out geometry to show different product configurations, using a very simple method of storing different snapshots of the model and switching between them.
As you’ve already done all the calculation, updates are instantaneous and can even incorporate animations where needed.
Of course, should you then need to get a full rendered image, you hit the keyboard shortcut to switch on the ray tracing engine, and it’ll calculate right there on the screen. If your hardware is powerful enough, it will give you a full ray traced image in seconds.
Conclusion
It’s worth noting that VRED is modular in nature, so users have a couple of different options.
The base-level VRED has all the basic rendering functions. If you want to start adding in animation, the more native CAD import formats and/or variant design review, then you need VRED Design.
And if you want to start using the system for large-scale projection, as well as VR support, then you’re looking at the VRED Pro variant.
In terms of usability, the system is perhaps more in line with more general-purpose rendering systems, rather than those targeting the product design space (KeyShot, for example). But as ever, that’s not always a bad thing: more control gives you more capability and more ability to fine-tune the process.
One thing that the system lacks, however, is dynamic linking to source geometry. With Autodesk’s track record in this space, that’s a bit of a surprise.
On the upside, and in terms of what makes the system more interesting, is the ability to use both a ray-traced and a pre-calculated mode within the same tool.
That gives you potential to experiment and to conduct interim design reviews, without the frustrating lag often associated with ray tracing. But of course, when a crisp, killer image is what’s called for, you have that ability as well.
One thing that’s worth noting is also the support for emerging display and interaction technologies.
While only the Pro variant has support for VR goggles such as Oculus Rift, this is the first design-focused system I’ve seen that natively supports such devices. Considering the current flurry of activity in that space, that’s a surprise.
Kudos to Autodesk’s team for including it. It would be nice, however, to see that support integrated at the lower end of the product range. VR goggles and similar devices, after all, are dropping in price and are no longer the preserve of big automotive OEMs and large engineering firms.
If you’re in the market for a stand-alone rendering system, then VRED is worth a look — particularly given that it gives you a nice clean workflow to generate imagery quickly, but adds in the controls and additional options that could help with decision making.
| Product | VRED 2016 |
|---|---|
| Company name | Autodesk |
| Price | on application |