When Formlabs launched its Form 1 machine on Kickstarter, it took the 3D print industry by storm.
The new Form 1+ is a high resolution desktop 3D printer
While much of the action at the desktop level had, until that point, focussed on filament based machines, the Form 1 looked to bring the resinbased, high resolution build method of stereolithography (SLA) to a much wider market.
Since then, the machines have been shipped to customers, but earlier this year Formlabs launched an updated iteration of the initial model, incorporating a few changes (mostly under the hood to the mechano-optics) to solve issues that early customers uncovered.
Delivery and set-up
The Form 1+ is delivered in a couple of boxes. Within those, you’ll find the machine suspended in cling film and packaged up to the hilt to keep it safe.
Then there’s the Finishing Kit that we’ll get onto shortly. You’ll also find the resin bottles in a smaller package.
Set-up takes a matter of minutes. Once the machine is out of the box, all the packing removed, you’ll need to find a location that has enough room around the unit and at the rear so that the upper part of the case can be tilted back to fill the resin tank, put in the build platform and get things running. It’s also key that the workbench or desk is level.
In terms of connectivity, it has the ever present power brick and a USB cable to connect it to your workstation/laptop.
Unlike many systems, you don’t need to have the machine connected to a PC once the data is loaded, so the space requirements are smaller than many such machines.
It’s then a case of loading the software (it runs on both Windows and Mac) and filling the resin tray. This is an orange acrylic removable unit and it’s suggested that you do this away from the machine, to avoid any spillages into the open internals.
Handily and unlike the previous generation, it comes with a lid. This serves two purposes. Firstly, it means you can pour in the resin and place it in the machine without spillage, it also means you can store unused resin without fear of it curing from exposure to ambient light (it’ll keep for a couple of weeks).
The tray is marked with levels so you don’t overfill it — again, avoiding any risk of spillage. Once the resin has settled, you’re about ready to get working.
Your first print
As with any machine, your first print is always an exciting time.
The PreForm software gives you tools to automatically orient your part, generate supports and inspect the build
The good news here is that, unlike some of the other desktop machines in the same price range, the Form 1+ comes fully calibrated out of the box. There’s no build platform levelling and there’s very little in the way of learning curve. Perhaps the only portion of the process that presents a challenge is getting your head around the set-up software and learning the ins and outs of setting up a print job for the best results.
The good news is that Formlabs’ PreForm software is pretty straightforward. It’s clean, fresh and clearly laid out. You begin, as you might imagine, with importing the STL file of the part (or parts) you want to build. Formlabs has licensed the STL fixing tools from NetFabb, so even if your STL file is less than perfect, chances are it’ll import into the system.
One thing that’s common, particularly with downloaded data (less of an issue in a professional environment), is that units are often a bit wonky. Again, the system recognises common issues and gives you the chance to correct the scaling.
From thereon in, you’ll see the model presented as it was exported and in the generating system’s co-ordinate space.
While it might look ideal, the build process that the Form 1+ uses means that some orientation is most likely to be needed. To explain further, the system builds upside down.
The sweet spot for the Form 1+ and the black resin is super detailed, intricate components. This part has sub 1mm features that built perfectly
While those used to most other processes will be familiar with the machine depositing material on top of each successive layer, here it’s the other way around. All of the laser and optics are in the base of the unit and it builds from the bottom of the build platform, through the resin tray and curing each layer.
The machine then peels away the tray with a mechanical action, moves the platform up and resets the layer of resin to the defined thickness using capillary action to coat the previous build. Watching it work is rather magical, as your model slowly emerges from the resin.
Because of this build method, parts need to be oriented so that there’s not a huge cross section of part being built at once — which might cause the part to rip off the build platform (as it causes suction between the tray, the resin and the already built parts). Using the Orient parts command does this automatically.
Here you need to look at the orientation of the part, decide whether you’ll get the results you want and perhaps tweak or have it orient again.
Once done, you then use the Generate Supports operation. As with all such machines, you need to build in supports to help the build process.
Again, the build process means that this is key to having a reliable build and getting the results you want. Because the machine uses the same support material, a little extra thought put into where the supports touch the part and which surfaces are key to your build, is time well spent. If they can’t be avoided, it might mean a little post processing with some sandpaper, but that’s about it.
Handily, the supports can be edited to a good degree, so you can remove those where they might cause issues and add them into other positions. The real time feed back that shows these areas is a benefi t here and the display shows, in red, where extra support is needed.
Our test carburetor component, straight out of the machine. You can see the internal supports automatically placed by the PreForm software
Also, a slider to the right hand side of the screen lets you step through the ‘slices’ or layers of the build — I found this useful for finding areas that might be missed or need additional support.
Compared to the brute force nature of support generation in many desktop FDM systems, the PreForm software gives you solid results that, with a little experience, let you get the results you want.
My personal advice is to forget what you’ve used before and trust it to get the orientation. We only had one failed build during our time with the machine and that was down to us trying to second guess the set-up software.
Resin options
While it’s key to understand the ins and outs of the machine, its components, its set-up software and the basics, what really makes any 3D printer are the material options.
The Formlabs machines were initially shipped with a slick grey resin, but the colour offering has been expanding over the last few months — with the black resin being the most recent, launched alongside the Form 1+. Each is supplied in 1 litre quantities, in a tidy brown bottle that keeps the UV light out.
Don’t get all excited when the clear resin parts come out of the machine. As it cures, it loses that transparency, but it can be brought back with a little polishing
Grey Resin: This was the first resin Formlabs released with its machine. The grey gives a nice finish, builds consistently and combines a ‘primed’ look that shows off the form of your model and detail nicely.
It’s ideal for concept models, form evaluation and parts that need finishing with paint.
White Resin: It’s ice cold white, ready to show off form perfectly. Compared to the clear and black resins, this is a stiffer material that’s ideal for models where structural stiffness is essential — given those parameters, it’s also worth noting that it’s more brittle than others that we tried.
Clear Resin: The clear resin is, as you would expect, transparent. When it comes out of the build chamber, you’ll see a nice transparent part, but once it’s been through the IPA and curing, it’ll lose some of the clarity. It is possible to get this back with some polishing, however. There are various methods described by users on the Formlabs forum.
Black Resin: This is the latest addition to the range. The black resin is ideal for models that feature fine details. The black colour means that light doesn’t ‘bounce’ as much, so gives a much crisper finish than the others. It’s also more elastic than the white and clear resins so has a little more ‘give’ and less prone to brittleness.
The build & post processing
As we’ve discussed, the Formlabs machine builds from the bottom up, unlike most other 3D printers.
While for earlier machines from other vendors, the team seem to have got over some of the issues and the machine works away while you just sit and wait.
The LCD display gives you a count down on how long to expect until the build completes and it’s bang on accurate. Then its a case of tilting back the upper case, flipping the locking lever on the build platform and removing the parts. Then comes the fun bit.
Once you’ve extracted the build platform (and closed the upper case again to stop that resin curing), you move to the Finishing Kit.
This is a vac formed station that includes a place to stand the build platform. This gives you a sturdy place to pull out the included scraper and pry the model off the platform.
Because the system typically generates a base and a set of supports, this is pretty trivial. Locate the smaller notches that the software puts into this base, slip the scraper under them and the part will pop right off. Give that build platform a wipe down and return it to your machine for the next print.
You now have a set of parts that are ready for treatment in the lockable isopropyl alcohol tubs. It’s simply a case of dropping the parts into that IPA, sealing the lid and giving them a gentle shake for a minute or so. Then let the parts soak for another 10 or so (set a timer on your phone to remind you — don’t leave them much longer).
Once done, remove them (done very easily using the included tray) and let them drain a little.
Then you need to cure the part. The system isn’t supplied with a curing oven, instead the team suggest you leave the parts in sunlight to cure further and harden off. What we found works a treat is to purchase a UV tool steriliser (they’re about 40 quid from ebay or Amazon) and pop them into that. It’ll cure and harden the parts in about 30 minutes typically.
We also found it’s best to leave the supports on while you cure — you get a much better finish when snipping them off.
Again, this process of removing the supports is simple. While many will break away with a little force, the included flush snips make short work of it. For many parts, they’ll be good to go and be used for whatever purpose. If you have a heavy support structure, it might be worth another cure session to harden those areas off finally.
Conclusion
I’ve written about my own frustration with desktop, lower-end (in terms of price) machines consistently over the last few years.
These cheaper machines are, in many cases, prone to needing constant maintenance, calibration and tinkering to keep them working.
What I’ve found is that, unlike other machines we’ve played with, the Form 1+ is a reliable beast.
As mentioned previously, we’ve only had one failed build in a month and that was down to ignoring the software’s recommendations, rather than a machine fault. Other than that, it has worked for 20 hours a day, day in, day out and not once given us any issues.
In terms of office friendliness, there are two things to consider. The first is that the machine itself, while building, is very quiet and there isn’t the smell of molten ABS or PLA that you get from filament-based machines. That alone, in my book, makes it much more friendly for design office use.
Where things aren’t quite so clean is the post processing. Because you’re using isopropyl alcohol, have uncured resins on the builds and platform, you’re going to need somewhere that’s well ventilated and easier to clean up — preferably away from the office environment.
In terms of costs, there’s the up-front investment in the machine. The list price of €2,799 includes the machine, the finishing kit and one bottle of resin of your choice. I’d suggest stocking up with a few of the resins (at €125 per litre) to try them out and a separate build tray for each.
It’s also worth noting that the resin trays have a limited life span and will probably last you a couple of litres of resins’ worth of builds. They’re also a bugger to clean, so if you’re going to run multiple resins, then I’d suggest having a separate one for resin you run (they’re €49 a pop).
In terms of results, the machine has the capability to run from 0.1mm layers down to 0.025mm. Considering the price point of this machine, that’s a rarity indeed. Of course, with that resolution comes an overhead in terms of build times.
The reality is that for most parts, unless they feature extreme details, building at 0.1mm will give you a nice clean model with very little in terms of clean and finishing. Ramping that up to 0.05mm increases the build time, but it will be a nice trade off between replication of detail and build time. Save the 0.025mm for the small, intricate parts (jewellery and small electronic connector components are good examples).
In terms of material use, there’s an interesting relationship between the volume of material used for the part and that used for the supports. You can see from the table below how this can vary and the associated costs and build times at various resolutions.
I have to admit that I was surprised at how reliable the Form 1+ was. There had been rumblings in the user forum about the first generation of the machine, but those seem to have been addressed with this latest incarnation.
It’s also worth noting that the machine now comes with a one year, return-to-base warranty — and those warranty activities are done in conjunction with the Express Group based in the UK, so there’s no heavy transportation fees anymore — making the machine much more attractive to the professional studio where up time and robustness are key.
There is a learning curve but only in terms of support placement and editing, but once you’ve got a handle on it, the parts come off the machine nice and cleanly with a little planning.
The resin isn’t overly costly and it appears to be a reliable machine, building at resolutions that are rare at this price point. Considering that this thing is under 3 grand once you’ve added on resins and tray, then it’s hard to find fault with it at all.
The desktop SLA market is exploding this year, ranging from home brew products that seem vaguely cobbled together to well thought out, well constructed and supported products like the Form 1+.
If you’re in the market for a 3D printer, take a look. Believe me, you’ll be amazed at the bang for buck.
Tech-specs
» Formlabs Form 1+ » Stereolithography (SL) build process
» 125 x 125 x 165mm build volume
» 300 x 280 x 450mm machine dimensions
» 3.5kg + 1.05kg power adapter
» 0.025 – 0.1mm layers » Variety of UV curable resins
» Post processing and finishing kit included
» 1 year return to base warranty (UK-based european servicing centre)
» 8kg
» Price €2799 + VAT (inc. Machine, Finishing Kit + 1 litre of resin)
Shopping list
UV tool steriliser (~£40): The Formlabs machine uses UV curable resins and while they’re solid straight off the machine, to get the best surface finish, you’ll need to cure them for a little longer.
While the sun will do it, on a tight deadline, you’ll need something more effi cient. A good bet is a UV tool steriliser, as used in beauty salons.
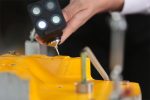
405nm laser pointer(~£6): Whether you’re joining larger builds or fixing parts in place, a decent method is to use a UV laser pointer to cure a little resin to solidify the parts in position.
Should cut down on any post processing or clean up. It’s also a nice way to fill any artifacts from support break away.
Isoprophyl Alcohol (~£5 per litre): Used to dissolve any excess resin. Get hold of 5 litres as a start. Keep it clean and you’ll get nice clean prints as a result.
Novus 1 (~ £11): An acrylic cleaning solution (such as the resin tray) that’ll give consistent results.
Microfibre cloths: These are essential for cleaning the base of the resin tray to keep your builds nice and crisp.
Non-powdered gloves: Get them, wear them.
| Product | Formlabs Form 1+ |
|---|---|
| Company name | Formlabs |
| Price | €2799 + VAT (inc. Machine, Finishing Kit + 1 litre of resin) |