
KeyShot has grown in sophistication and power in recent releases. We take a look at KeyShot 8 to see if Luxion can continue to expand its capabilities while still retaining its legendary ease of use
KeyShot’s background is as a system intended to provide the quickest route between your 3D design data and a photorealistic rendered asset. While in its first couple of years, the focus was on the production of static images, more recent releases have extended this to cover not only animations (both as movies or as 360-degree rotatables), but also configurators for sales and presentations.

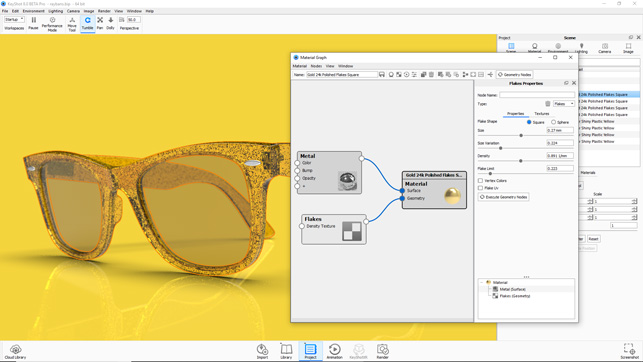
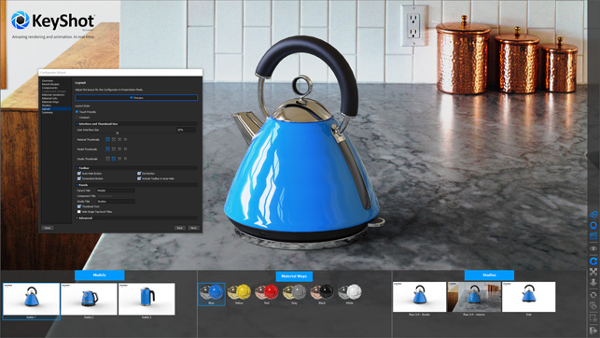
Fig 1: The new Flakes capability makes the rendering of complex materials (for example, filled polymers) a snap once you get your head around the workflow
At the same time, the system has in recent releases started to gain sophisticated tools for creating more realistic, more complex and more demanding material descriptions.
While the core geometry import tools are there, many of these have been geared towards solving those complex rendering problems that might otherwise require a more general-purpose rendering system (such as 3dsmax or Maya, for example). So shall we take a look at what’s new in this release and see where KeyShot is today?
The good news is that the Keyshot user interface remains much the same as in previous releases. There’s just a few tweaks here and there to make it more usable. For example, there’s a new autosave function that reminds you to save your work – simple, but useful for when you’re in your groove and might otherwise neglect this vital task.
Other than that, and some updates to the formats that the system now supports (including the addition of Rhino 6 and Inventor 2019 support), Keyshot looks pretty much how you remember it.
Keyshot 8 – materials updates
That said, this release is a pretty big milestone for Keyshot in terms of materials support.
While the last few major releases introduced things like procedural materials and the all-new material graph (itself responsible for some added sophistication), KeyShot 8 brings some important background work to fruition.
Perhaps the biggest news is the addition of a geometry shader. While we should all be familiar with the ideal of a material shader, which controls how the surface of an object looks, geometry shaders differ in that they can create or modify underlying geometry.
The difference is perhaps best explained by looking at the difference between the existing bump map tools and the brand-new displacement map options.
A bump map uses a greyscale image to ‘fake’ how a surface on an object, can vary in height. While the effect is ok, it’s a fudge that only really works with small variations in height and doesn’t make any edits to the underlying geometry.
A displacement map, on the other hand, uses a map or other process to make changes to the actual geometry, according to requirements. If you take the example of a car tyre tread, a bump map can sort of replicate this, but the effect is a little underwhelming.
By using a displacement map, along with the same texture map, you can get a much better representation of how the tread should look. In this case, you are actually modifying the underlying mesh, which means not only does the part and texture look right, but also how it interacts with light matches reality much more closely.
What Luxion has done is start to introduce geometry shaders into KeyShot and the materials and effects you can replicate are really interesting.
While displacement maps are pretty well documented, for those times when you want to add a specific set of deformations to an object but don’t want to hard model it, it’s ideal. This could apply to adding texture or geometric features; for example, think of the shape of a gravel floor versus adding product detailing or labelling.
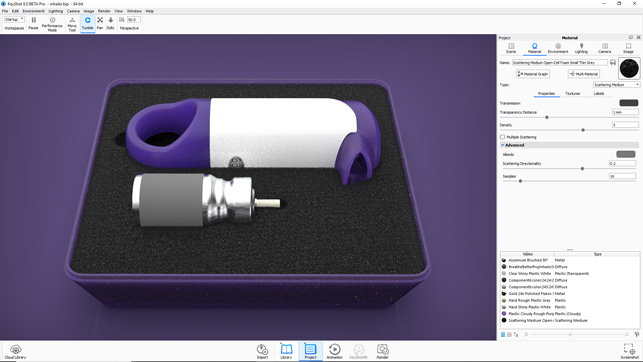
Fig 2: KeyShot 8.0’s displacement map tools indicate that Luxion is looking to take advantage of its new materials engine in coming releases. Here, a structural foam is replicated accurately, rather than using a texture and opacity map
Keyshot 8 – bubbles & flakes
Geometry shaders can also be used to construct more esoteric materials. For KeyShot, the system gains both flakes and bubbles as options.
Bubbles are pretty straight forward. Choose your material, add in the geometry node in the material graph, attach it to the geometry input of the material (see figure 1 for a look at how a flake material is structured) and you can add spherical voids to your material. You have full control over the size (including variation of size), distribution and density of bubbles.
This is most immediately useful for liquids, but also consider building an accurate glass bottle model; quite often, you’ll see small bubbles in the glass. These would be difficult to hard model in, but with the geometry shader, the job becomes pretty simple.
Things get really interesting when you start to explore the flakes option. You have full control over the form of the flakes (either rectangular or spherical), size (including variation) and density within a geometry body, as well as the material that’s applied. While on its own, that doesn’t make much sense, there’s a wee trick here: if you duplicate the body and apply your transparent material, you’ll find that you can very quickly replicate a wide range of polymer additives.

To enlarge image click here
keyshot 8 – scattering medium
Moving on, another new material is scattering medium. This allows you to define materials that simulate particle scattering such as smoke or fog and can prove useful for adding in light effects, smoke and such.
It can also be adapted to quickly simulate materials such as open core foams (as seen in Figure 3).
It’s worth noting that while these can be applied to a geometry shape, there’s also the ability to import OpenVDB format files to store particle simulations from other systems. (Take a look at www.openvdb.org for more information on this.)
Elsewhere on the materials front, there’s been work done to remove some additional workarounds relating to modelling and rendering the interface surfaces between hard parts and liquids.
While previously you might have needed to model in a gap or an interface layer, this is now taken care of automatically, saving you the trouble.
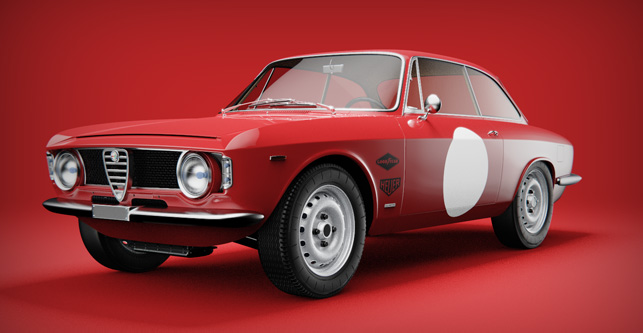
Fig 3: Similar to many updates in KeyShot 8.0, image styles (available both in preview and postrender) allow you to apply styling and adjustments to your image, without the need for post-processing in another app
Cutaway section views
Lastly on the materials front is section material. Those of us who grew up marvelling at bedroom-wall posters of the Rolls Royce Merlin engine (guilty as charged), or our parents’ trusty Haynes manuals, or physical models that allowed you to view internal details know from experience that a cutaway is a marvellous way to show how a product operates, particularly when cut surfaces are painted just the right shade of red.
If you wanted to achieve this kind of image previously, it typically involved some manual modelling in your CAD application and then importing the design.
Now, you can do it all in Keyshot. You begin with the model you want to section, and work through the usual workflow, applying materials, lighting and so on. Then, when you want to add in a section, you add a piece of geometry that represents the shape of the cutout.
In our example, we used a rectangular block, created using KeyShot’s primitive library. Then you apply the cutaway material. This will hide the geometry of anything crossing into that shape and apply your cut-face conditions, which are controlled in the material.
This first pass will cut through everything in the model, but if you want to then exclude certain items, you edit the material property and add the parts to your exclusion list. Compared to trying to knife and fork this, it makes some pretty complex renders a breeze – and don’t forget, anything you do can also be animated.
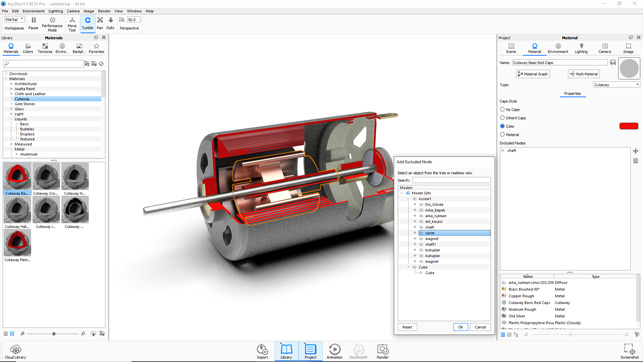
Fig 4: KeyShot 8.0’s cutaway materials make section views in 3D a snap to build and, when you play with the animation options, interesting things start to happen
Image styles
Moving away from materials definitions, image styles are another headline update in this release. As we’re all aware, rendering systems are good at getting you 95% of the way there, but in many cases, it’s that last 5% that really nails the image for its intended purposes.
This is where tweaks and other small adjustments can really make an image really sing and these changes are typically made in Photoshop: adjustments to colour balance, contrast/brightness, shadows, highlights, curve adjustments and so on.
To help you eliminate the need for this type of post-processing work, Luxion has introduced image styles. Essentially, these are the types of tweaks that are typically a post-render activity, but they’re built directly into KeyShot.
That means they can not only be applied after a final image is rendered out, but also during set-up and to the progressively rendered image that you work with.
There is a whole host of post-processing that can be applied and these can be saved out and reapplied in other render projects if you develop house styles. It’ll even let you add in a front plate (such as logo or similar), to save you ever opening up Photoshop again.
Conclusion
As we said at the start of this review, KeyShot has been through some pretty interesting release cycles over the last few years. These changes have seen the system grow exponentially from being a relatively simple rendering system for product designers into something much more sophisticated.
What’s interesting is that while development work has managed to bring some truly advanced rendering techniques on board (with displacement maps, scattering and much more), Luxion has incorporated these enhancements without ever losing the ease to use that has made KeyShot so popular.
This is perhaps the best compliment I can give the system as it stands today – it’s as easy to use as it was when it was first released.
All you need to do is load up a CAD file (with reliable CAD translators), add in some materials and render out your image, to get results that are among the best in the business.
At the same time, if you really want to dive in, dial in your materials, build up your 12-layered material graph flow chart, tweak your HDRi environment to nail those highlights and generate something truly mind-blowing, then you can do that, too.
KeyShot has evolved to bring you all the tools you need to create the remarkable images that today’s products need and consumers expect.
KeyShot Viewer: Making advanced visualisation portable
Keyshot Viewer may not strictly be new for Keyshot 8, having been introduced in the 7.0 release cycle, but it’s still very interesting.
Part of the attraction of a product like KeyShot is the ability to generate marketing assets to be used across a wide spectrum of company activities – for example, in the sales and marketing department.
Being able to distribute that content in an interactive manner is also increasingly useful. It’s something that the automotive companies have been doing for some time.
So what Luxion has come up with is a method of wrapping up everything from a KeyShot session (such as the model, variants in both models and materials, and environments and lighting) and making that portable dataset more easily distributable. In this way, it can be sent to whoever needs to have a more interactive view on visualisation assets. That could be marketing folk working with a photographer to finalise camera angles for a shoot, for example, or sales folk looking to demonstrate customisation options in the showroom using a configurator running on a touch-enabled machine.
It’s simply a matter of creating your dataset, adding in your options and exporting the Viewer file from Keyshot. Whoever needs to see it can download the free viewer for PC or Mac.
| Product | KeyShot 8 |
|---|---|
| Company name | Luxion |
| Price | from $995 |


