Imagine for a moment that all of your solid models could be formed quickly into the magical shape you desire – no messing about with curves, control points or boundary conditions.
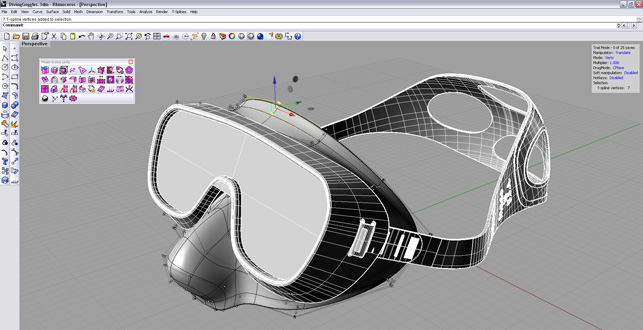
T-splines can work between Rhino NURBS and T-Splines surfaces to make small adjustments. The seal of this mask was adjusted slightly to fit better against the the face
The very thought of not having to manipulate a sub-feature of geometry to improve top-level surfaces may seem odd if you’re coming from a feature or constraint-based modelling system. But at the same time you admire the creation of creatures, planets, and vehicles in 3D modelling programs that seem to disregard parametric design and the whole concept of manufacturing.
Suddenly, while you ponder the steps to achieve surface smoothing perfection, a shift in the fractal nature of your modelling environment occurs. Solids can be surfaces, surfaces can be sub-divided, and every edge and vertex can be shaped without sketching a single line. How is this happening? T-Splines is making it happen.
A simple plug-in available for Rhino and Maya, T-Splines bridges the gap between two styles of modelling and makes it easier for designers to explore ideas while maintaining the control they need to design products for manufacturing.
To understand why T-Splines is so special, we’ll focus on Rhino, explore where the different modelling methods are merging, take a closer look at how T-Splines can be used and then dive into the workflows that are redefining the limits of traditional modelling.
NURBS vs. polygons
There’s been an unseen battle in 3D modelling, one that separates the mechanical from the organic, defining methodical workflows and how surfaces are created and viewed. It is the mathematical calculations of how curves are represented. It is NURBS versus polygons. Each has its strengths, but also its weaknesses and this is where T-Splines fits in.
NURBS, or Non-Uniform Rational B-Splines, are what most 3D modelling applications use to produce free-form shapes. Some just give you more control over these shapes, such as products like Maya and Rhino.
Rhino NURBS use control points to define the shape of a curve. The more control points, the more detailed a curve. Move that into the third dimension and you have a surface made up of control points. In Rhino, each control point on a curve represents a degree. For each degree you move out from a control point, your level of curvature increases, from 2, a very abrupt change in curvature to 11, a very smooth transition in curvature. In most product design scenarios a degree 3 curve is acceptable to maintain a smooth, continuous curve.
The mesh you see between the control points are isoparametric curves, or isocurves, which help visualise the shape of the surface and give you control over where the surface goes. Every single surface has four sides, called a four-sided patch. Close off a group of patches and you have yourself a solid.
Now, with all that said and with all the capabilities Rhino has to generate smooth surfaces, T-Splines brings a little more… polygonal modelling.
Polygonal modelling uses exactly what you’d expect to represent surfaces – polygons. Thousands, even millions, of them are formed together to create very smooth, detailed models. You’ll recognize this type of modelling in programs like Maya, modo and Blender.
Surfaces in a polygon model are controlled by the vertices that make up the polygons. Triangles (3-sided polygons) and quads (4-sided polygons) form together to create a mesh. This mesh can then be controlled by pushing or pulling polygons – more can be added, and they can also sub-divided (or split up). Because of this, polygons are simply faster to edit and allow you to create organic shapes quickly.
T-Splines bridges polygonal modeling techniques directly into Rhino and takes away the limits of using patches to define solids while at the same time allowing you to maintain curvature. However, T-Splines even has advantages over traditional polygonal modelling. Where polygonal modelling reduces surface complexity by creating more polygons, T-Splines creates T-points. This allows both curvature to be maintained and isocurve complexity to be reduced. Overall, it’s been developed to be the best of both worlds.
Using T-Splines
Getting started in T-Splines really couldn’t be easier. The developer has done a lot to make the tools, selections and commands mimic those of Rhino. That’s one of the great joys here, because, in a sense, you’re using the same type of tools to create geometry that you have a lot more control over.
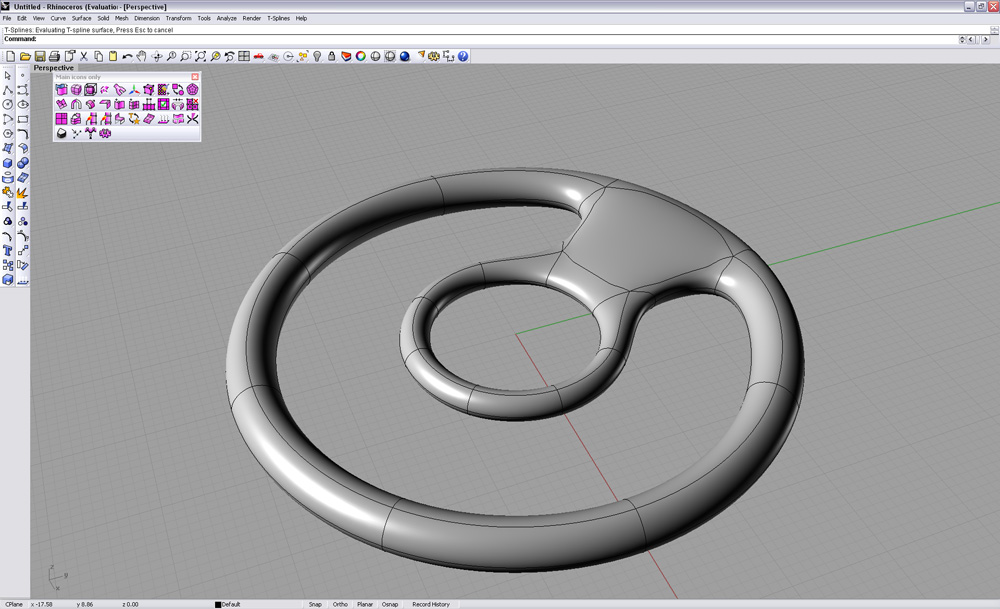
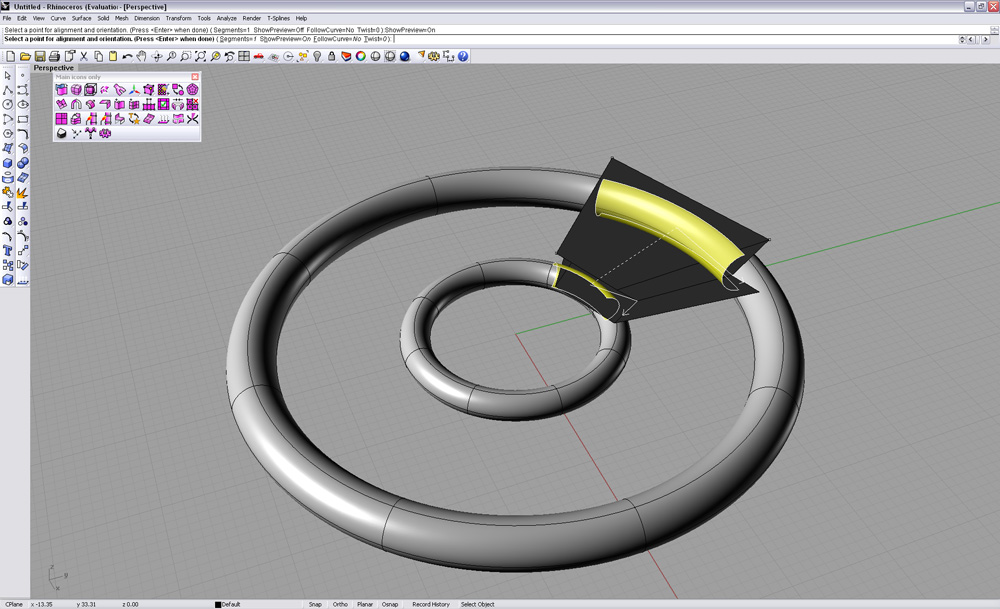
For example, creating T-Spline primitives is just like creating Rhino primitives. So, once you’ve used a T-Splines primitive to create the basic shape of your design, you’re free to set symmetry, sub-divide and pull your idea into existence with theT-Spline Translate tool.
It’s a quick method to layout your idea, tweaking it as you go, and the power lies in that single Translate tool for turning curves into surfaces and giving you control over each vertex, edge and face of the model.
Some of the best tools T-Splines introduces help speed up every portion of the modelling process. Only 34 tools make up the pallete with the majority being those which modify geometry, all of them focused on giving you the maximum amount of freedom over the model.
Points, edges and faces can be added, specific faces can be sub-divided and bridged seamlessly together with very little effort. You can paint selections, match T-Splines surfaces with NURBS surfaces and go straight from surface to solid with the Thicken command.
Commands you won’t find on the T-Splines toolbar are ones to create curves. This program is for pure geometry manipulation.
That doesn’t mean you can’t use curves though. Since T-Splines is embedded within Rhino, you have the power to use T-Splines tools on any sort of curve, polyline of arc generated with the Rhino tools. The same applies to any surfaces you’ve already created in Rhino. A single command converts Rhino polysurfaces into T-Splines surfaces allowing you all the freeform freedom thriving within the T-Spline toolset.
This all plays into workflow, a key factor we’ll discuss, as the T-Splines surfaces are not compatible with every Rhino command you may use. An example of this is the Rhino offset surface command. If you use this on a T-Splines surface the offset is converted to a NURBS surface. You can convert it back, but the result is a surface with many more isocurves. It works, but it’s not ideal.
The alternative is to use the T-Splines Thicken command or Duplicate faces. However, both of these are only approximations of the shell offset and don’t give you dimensional control over the thickness. This is just one example of where you need to consider how you’ll use T-Splines in your process.
Workflow
There are three very slick ways in which T-Splines has set up its toolset to be used within the Rhino interface. All three compliment the way you work, but all three also have their own limitations that need to be considered before starting, or finishing, a design. You can design using T-Splines by:
Starting off with T-Splines solids/surfaces
Converting Rhino NURBS surface to T-Splines
Using Rhino Curves to create T-Spline surfaces
All three of these are easy ways to learn the capabilities of T-Splines. Beginning with T-Splines surfaces and solids, aid to complete the free-form part of your modelling before adding details better suited for Rhino.
There are Rhino commands you’re limited to using with T-Spline surfaces, as mentioned above, but the idea here is to get the free-form modelling out of the way first before converting it to Rhino NURBS. Of course, the opposite of this may be more attractive. Converting a Rhino NURBS surface to T-Splines can provide a smooth way to clean up your surfaces or get the final bit of shape needed before sending designs off to manufacturing.
Converting is a simple one-button operation, but when changing to T-Splines, remember, it is an exact conversion so dimensional accuracy will be maintained, but modifying the surfaces will be more difficult to maintain dimensionally. One method is to set up blueprints – take care of your primary surface patches in Rhino, then convert those surface to T-Splines and use the T-Spline Bridge command to finish the model off. This can reduce the number of secondary surface patches needed and ensures a smooth watertight surface.
The last method is a mix of the two previous, where you set up curves, whether it be for a lofted surface or to define an envelope, and use T-Splines to extrude surfaces. This way, you create curves with the exact dimensions you want to maintain, then slip directly into manipulating the resultant faces with T-Splines. Once you do this though, you lose any relation to the initial curves.
Setting up Layers in Rhino can help with each of these, providing a separate place for NURBS models you want to reference or using them to hold a copy of your model before converting to or from T-Splines.
Planning a workflow is nothing that should take away from the T-Spline experience, but knowing your options can even be part of speeding up the process.
Conclusion
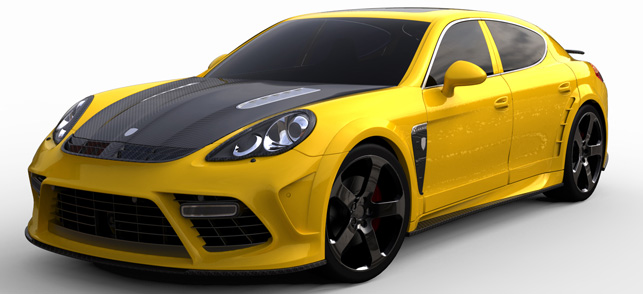
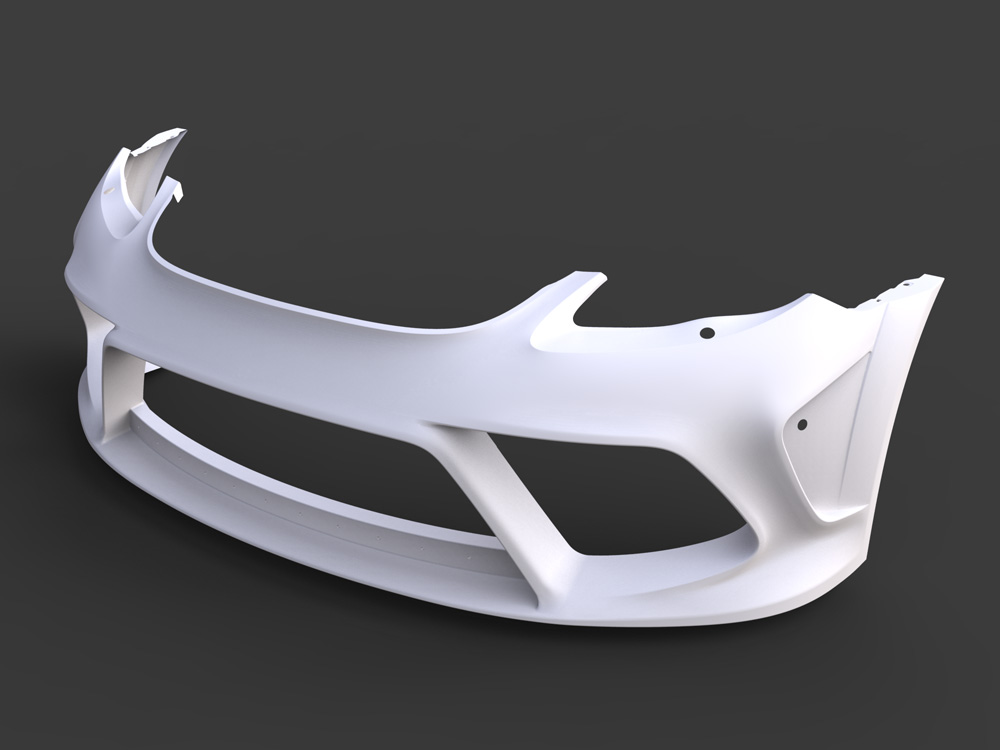
Road ready: the bumper hooked up to the rest of the bodywork
So here we are, moving surfaces around like we’re shaping the Universe. If you’ve worked with both NURBS modellers and Polygon modellers before, you’ll quickly realize how amazing T-Splines is to work with and how intuitively it’s been brought into Rhino.
You’ll nearly forget that control points exist and in some instance be relieved you don’t have to toggle them on. Faces and vertices are yours to explorer all within a familiar environment.
It’s downright surprising this is just a plug-in, because it’s so much more. It changes how you use Rhino… completely. T-Splines aims to be the fastest way to create free-form models and liberate you from the constraints of surface patches. They do it and the beauty is, you don’t realise you’re using the same methods to create your models as those rig-whippin’ character animators.
I’ve got to say, it’s brilliant. My only hope is that going back and forth between NURBS and T-Splines is improved, that they bring in more ways to define some of the geometry dimensionally and increase the number of Rhino commands that work within T-Splines. That’s being really picky, because if you go back for a few minutes, attempting to create the same surfaces in Rhino, you’ll be looking for a blunt object to run your head into.
T-Splines is spoiling us and there’s no doubt it’s going to get better or be seen across more NURBS-based modelling programs. Let’s hope it is… soon.
Read more about T-Splines for Rhino with our interview with T-Splines co-founder Matt Sederberg here
| Product | T-Splines for Rhino |
|---|---|
| Company name | T-Splines |
| Price | $1,494 (or $599 if you already own Rhino) |